• Skip to primary navigation
  • Skip to main content
  • Skip to primary sidebar
Picnic Lifestyle
  • Recipes
  • Picnic Tips
  • Summer
  • About
  • Contact
menu icon
go to homepage
  • Recipes
  • Picnic Tips
  • Summer
  • About
  • Contact
search icon
Homepage link
  • Recipes
  • Picnic Tips
  • Summer
  • About
  • Contact
×
Home » Picnic Dips

Simple Mexican Salsa Roja

Published: Jun 28, 2024 by Kate O'Malley · This post may contain affiliate links. See end of article for more information · Leave a Comment


Jump to Recipe Print Recipe

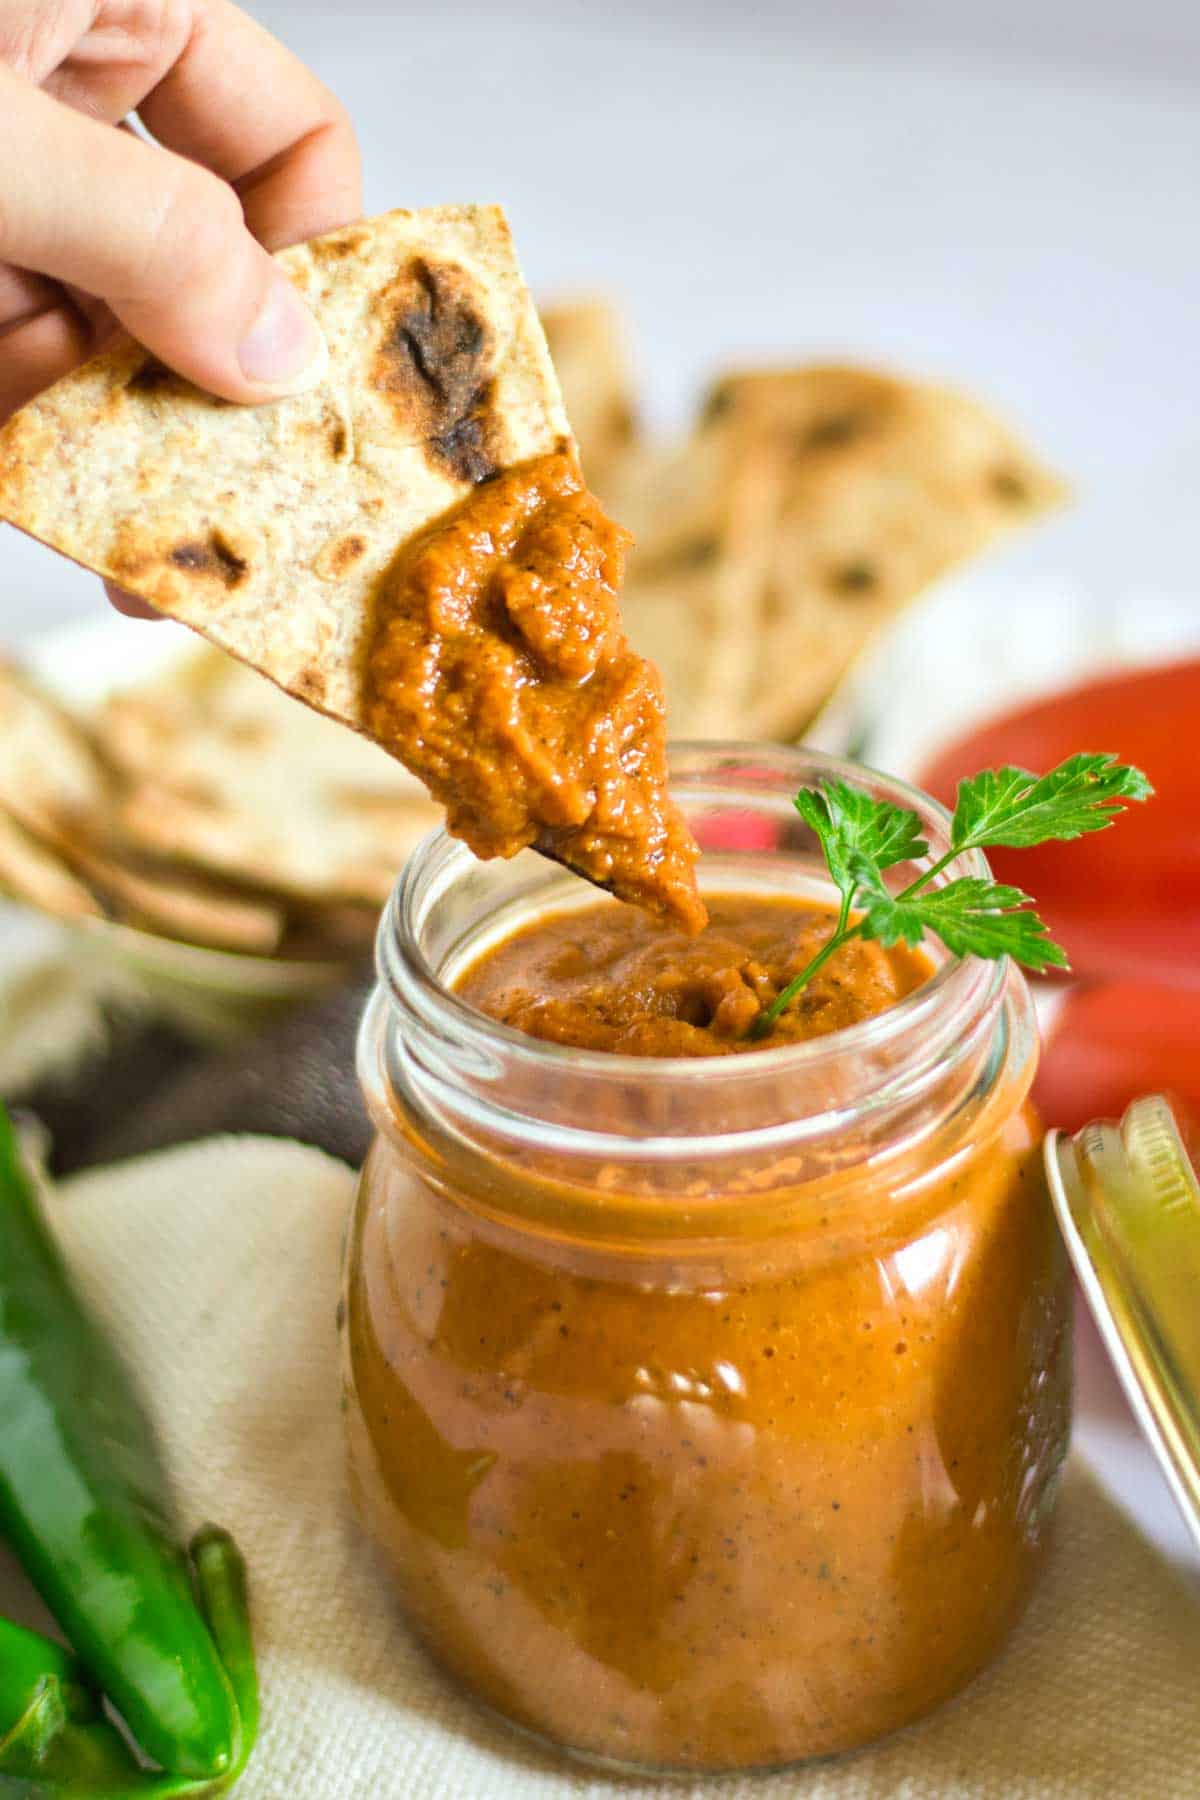
Mexican cuisine boasts many salsas, but one of the most popular is Salsa Roja, or “red sauce.” It’s a staple at almost every Mexican restaurant and home. It is also super easy to make.

Someone dipping a tortilla bread into a jar of homemade salsa roja.
Jump to:
  • Why I Love This Recipe
  • Ingredients
  • Recipe Variations and Substitutions
  • How to Make Mexican Salsa Roja
  • Expert Tips
  • How to Serve Salsa Roja
  • Related Recipes 
  • Mexican Salsa Roja

Why I Love This Recipe

I have loads of good dip recipes, but this is one of my favorites. Salsa Roja is so easy to make, requires only a few fresh ingredients, and works well with so many dishes.

All of these attributes make it a quick and easy dip or side sauce you can whip up at a moments notice, or always have on hand in the fridge.

I love this sauce for picnics–Mexican dishes make perfect portable feasts with their simple, fresh finger foods. Check out my ideas for a Mexican-themed picnic for tasty and easy recipes.

Ingredients

Ingredients for Mexican Salsa Roja

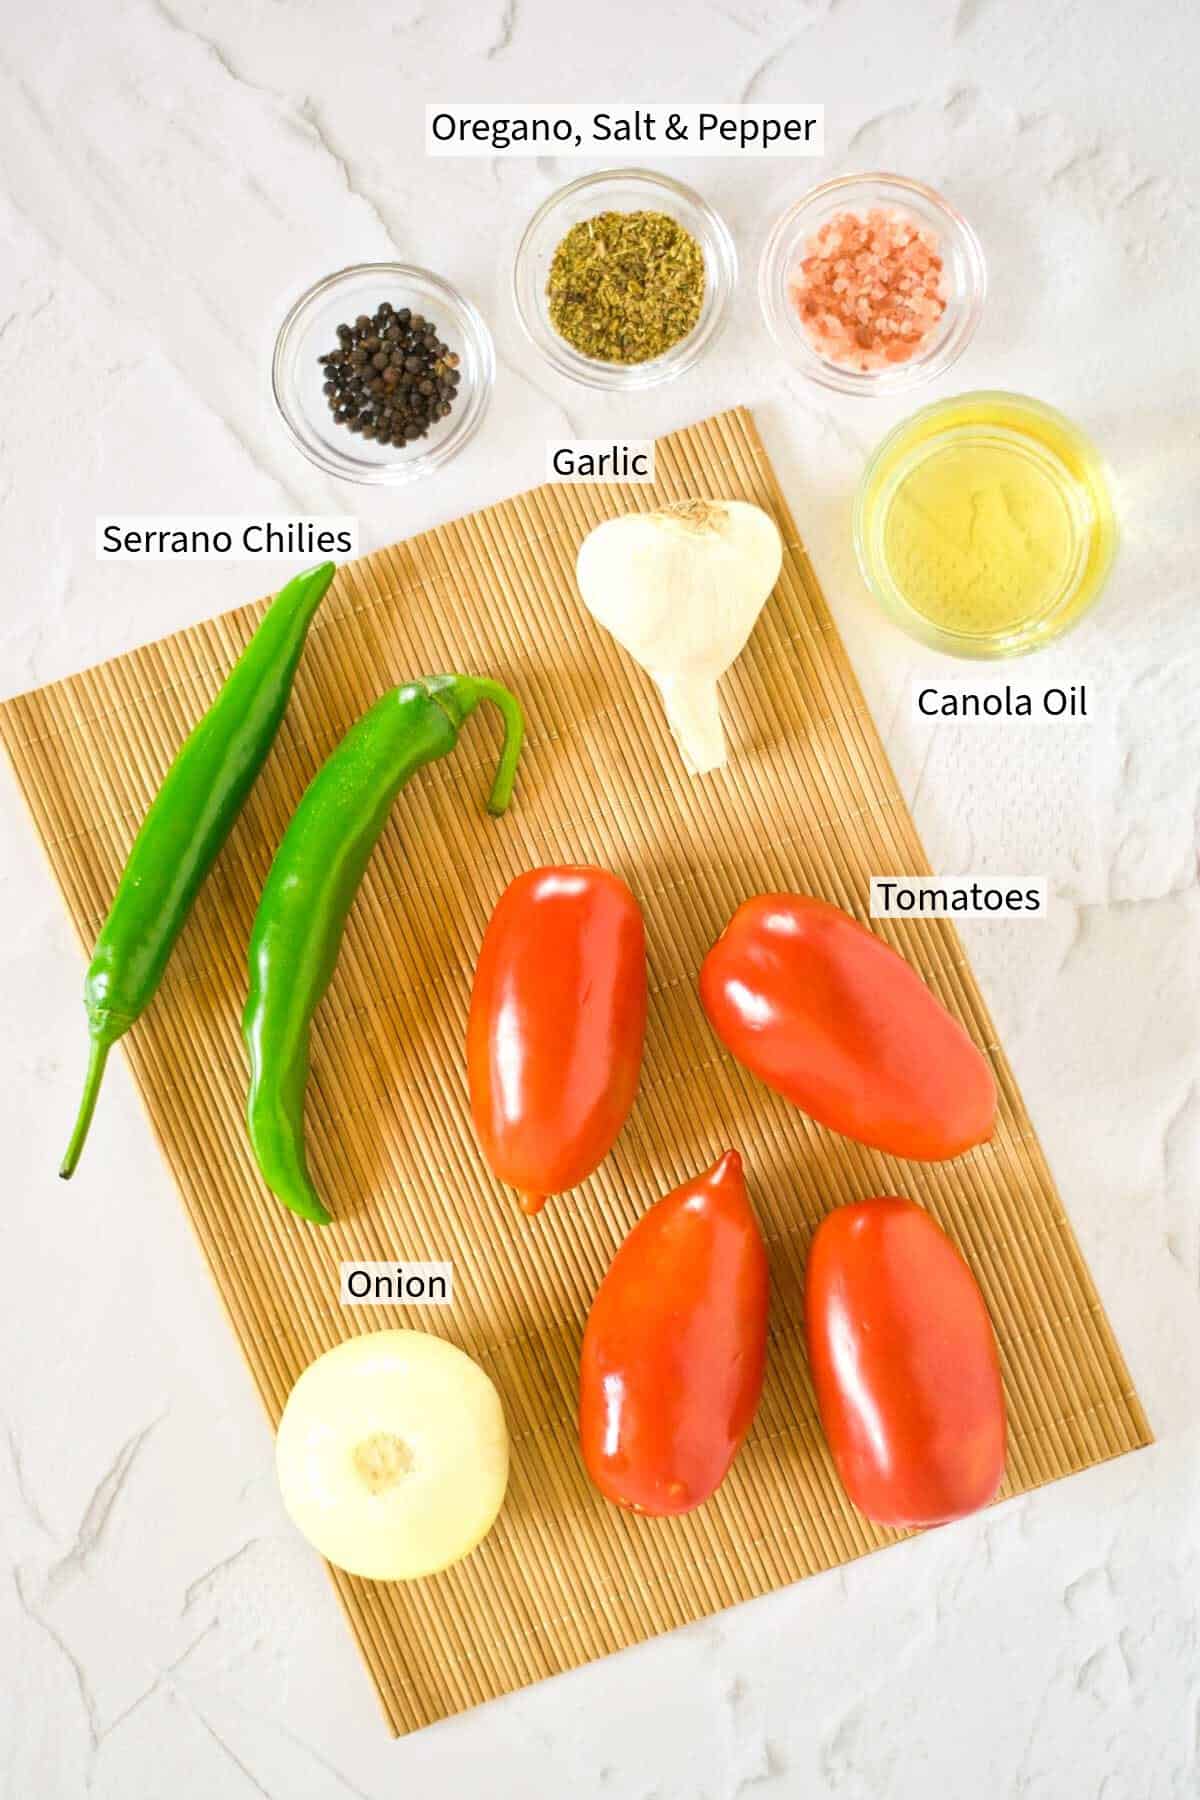
See my recipe card below for a complete list of the ingredients with measurements and notes.

Recipe Variations and Substitutions

Salsa Roja recipes vary by region, tradition, or even mood, but the basics remain the same. This version uses seven simple ingredients, but feel free to adapt it to your taste.

  • Chili: Some people like to add two types of chilies for depth of flavor – dried Arbol chiles and jalapeños are a popular mix for a pop of heat with a splash of freshness. Some like to use dried only over fresh.
  • Additional Acid: If you like your salsa roja a little tarter, you can add lemon or lime juice. I find the tomatoes add enough acid but it’s not unusual to add lemon.
  • Cilantro: While I have not included it in this recipe, fresh cilantro is another popular addition. It’s a contentious herb with a love-it-or-hate-it reputation, but feel free to throw in a small handful of fresh leaves.

Chili Tip: Chilies are a hard ingredient to quantify regarding heat. If you don’t like a lot of heat, I recommend adding the chilies incrementally when blending to ensure the heat is to your liking and/or tolerance levels.

How to Make Mexican Salsa Roja

Step 1: Wash, dry, and prepare all your ingredients for the sauce. Remove the seeds from the chilies.

Grilled vegetables for salsa roja in a pan.

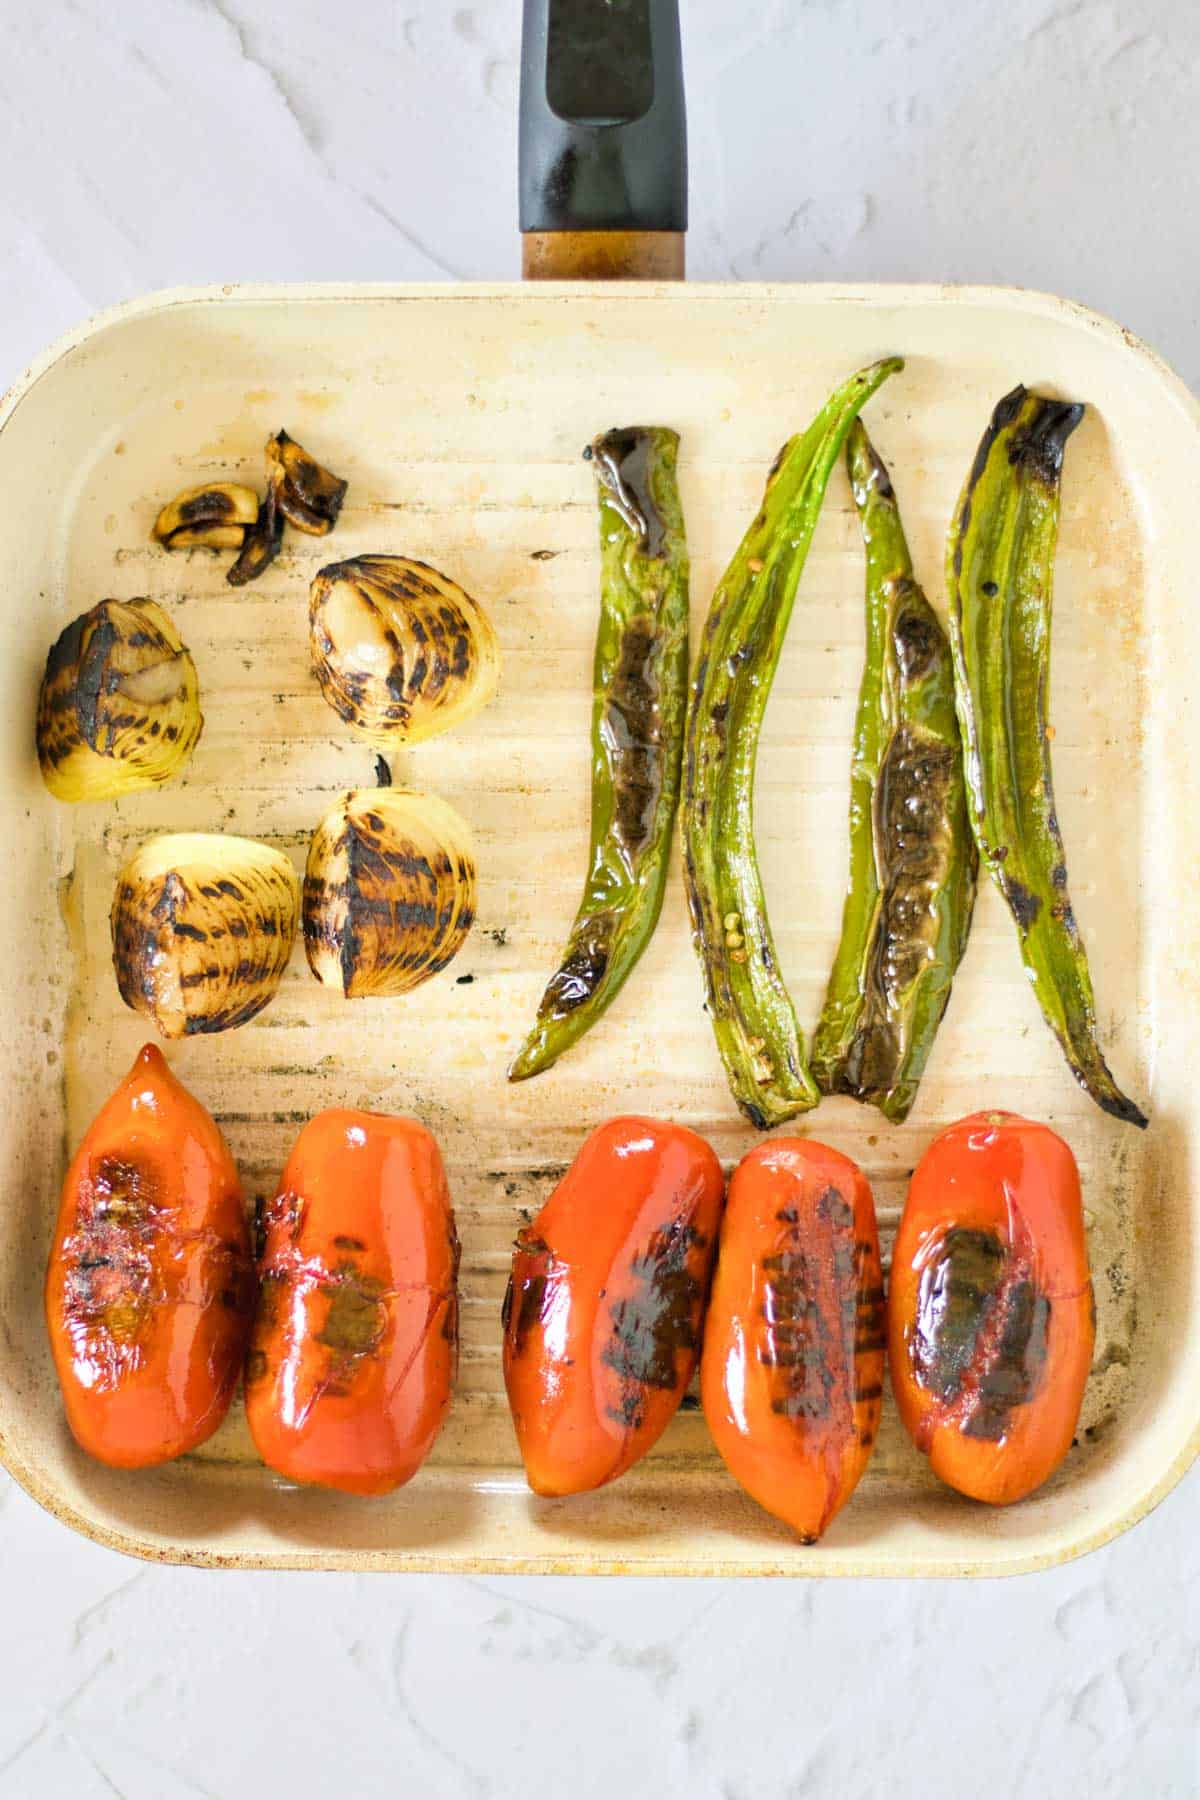
Step 2: Add oil to a skillet pan and preheat to medium-high. Start by adding the tomatoes to the pan followed by the chilies, garlic, and onion.

Pan-fry all the ingredients, turning, until they soften and blacken (Only blacken the outer layer of the ingredients). You can also do this step on a BBQ grill.

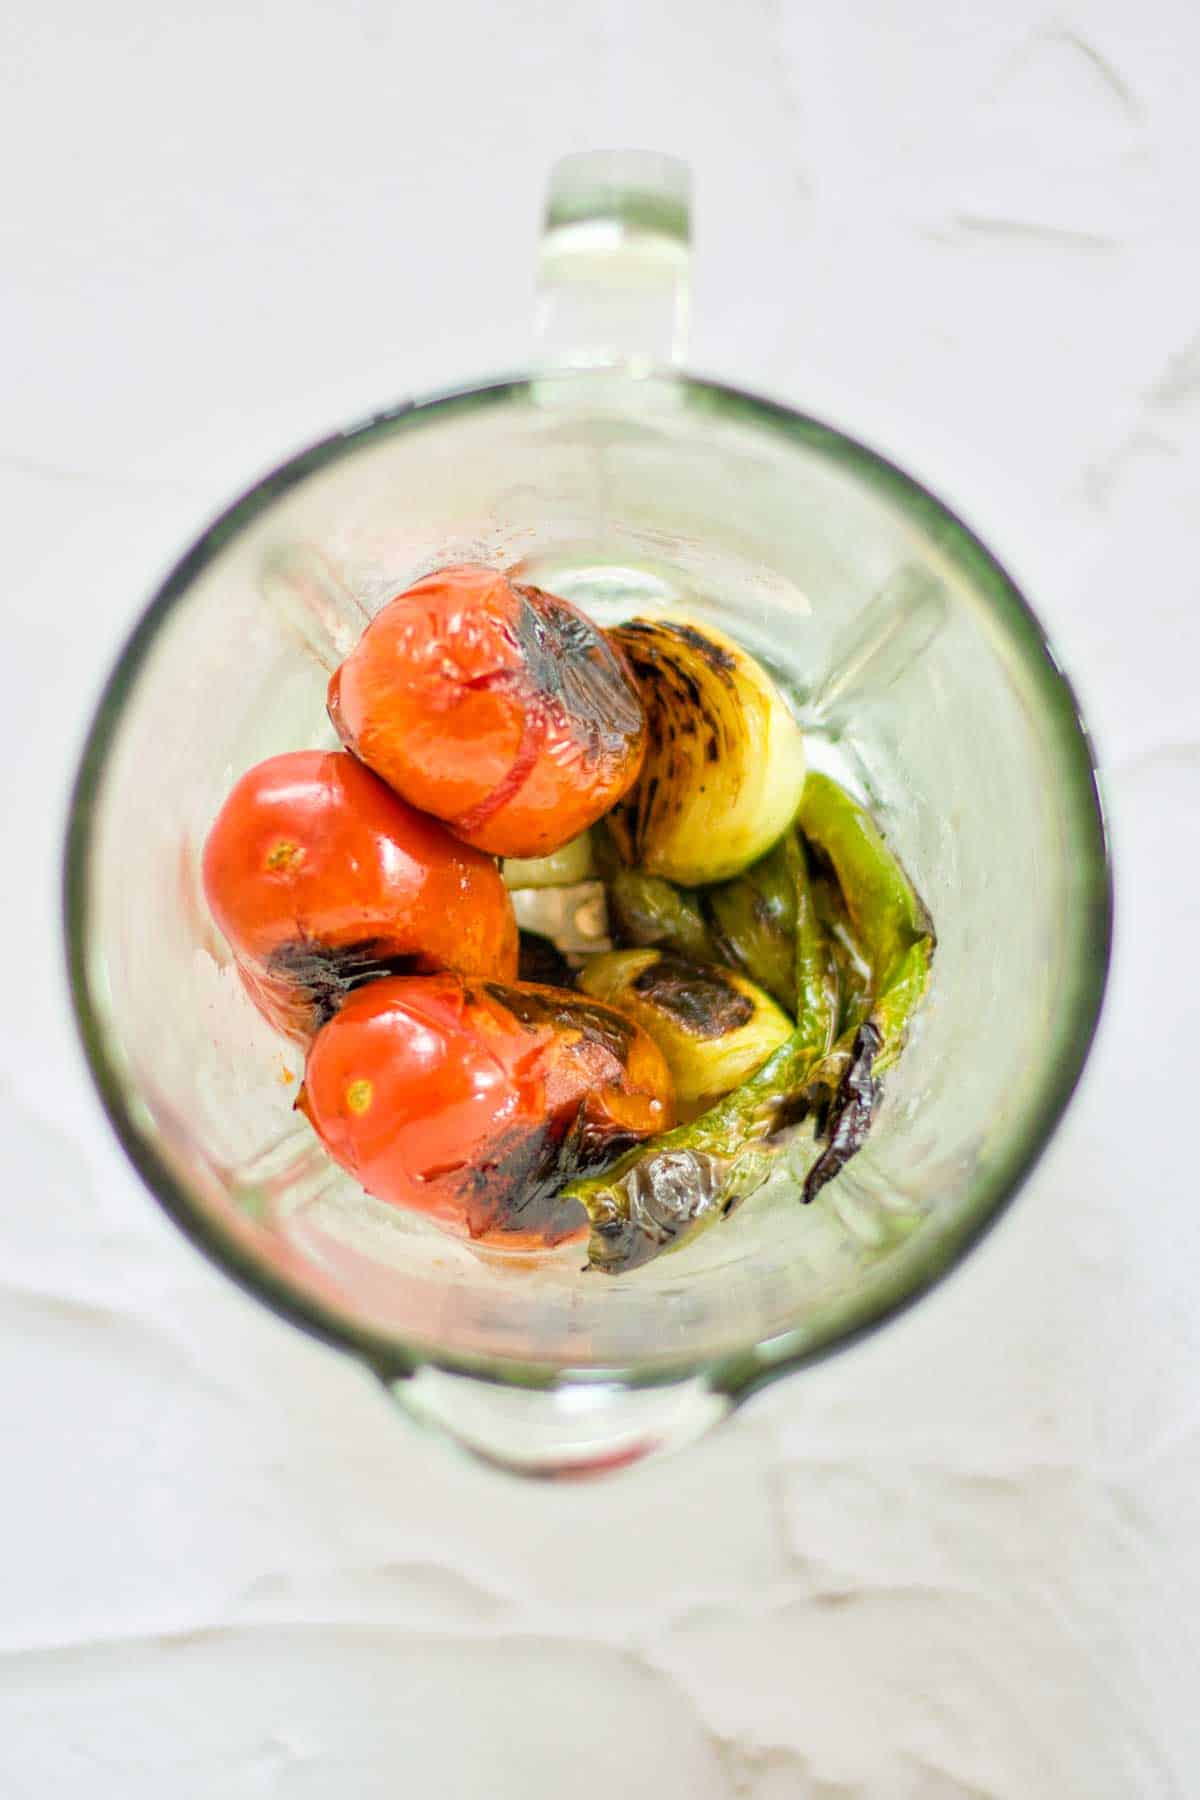
Step 3: Once the ingredients have softened and the outer layer blackened, transfer them to a blender or a food processor. (You may want to add the chilies incrementally to ensure your desired heat levels).

Overhead shot of salt being added to a blender with ingredients for salsa.

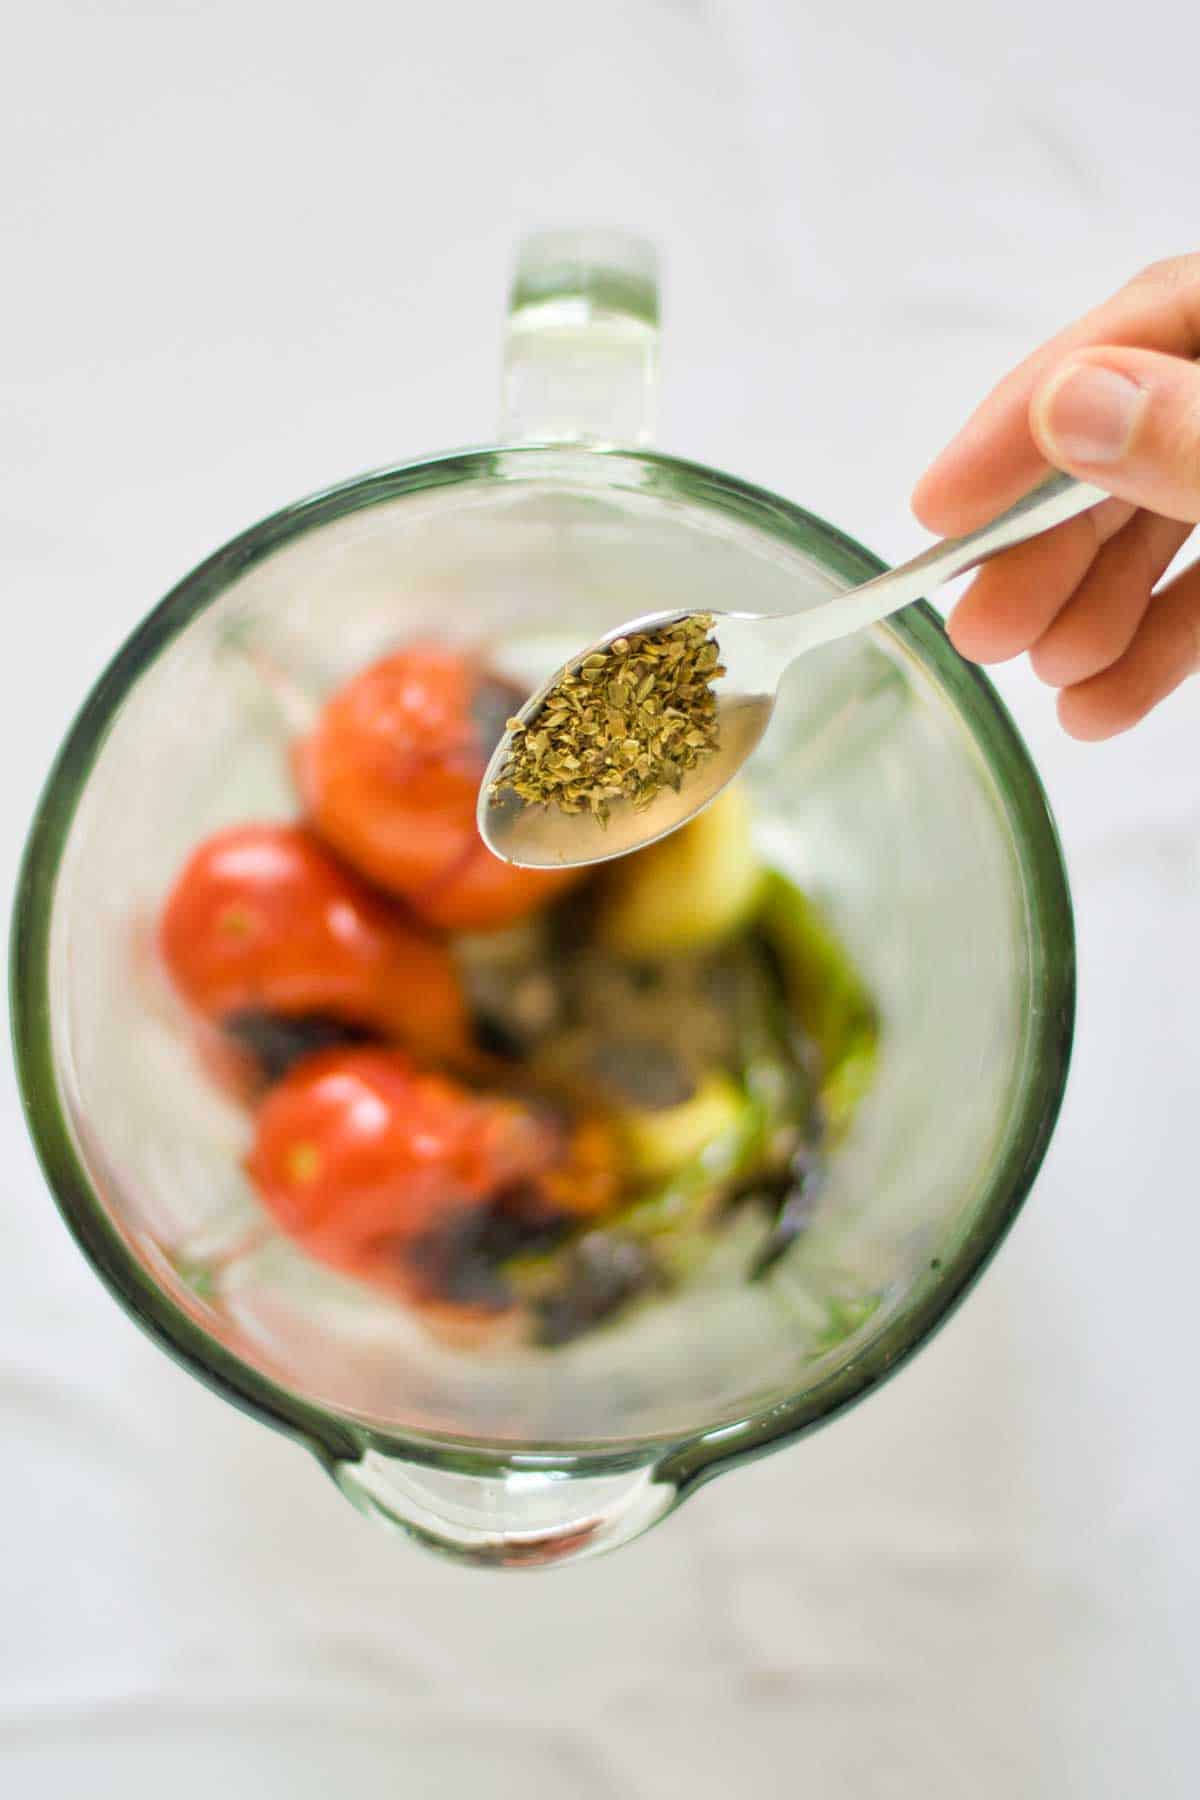
Step 4: Add salt, pepper, and oregano (Add any additional spices or herbs such as cilantro now).

Overhead shot of blended salsa roja in a blender.

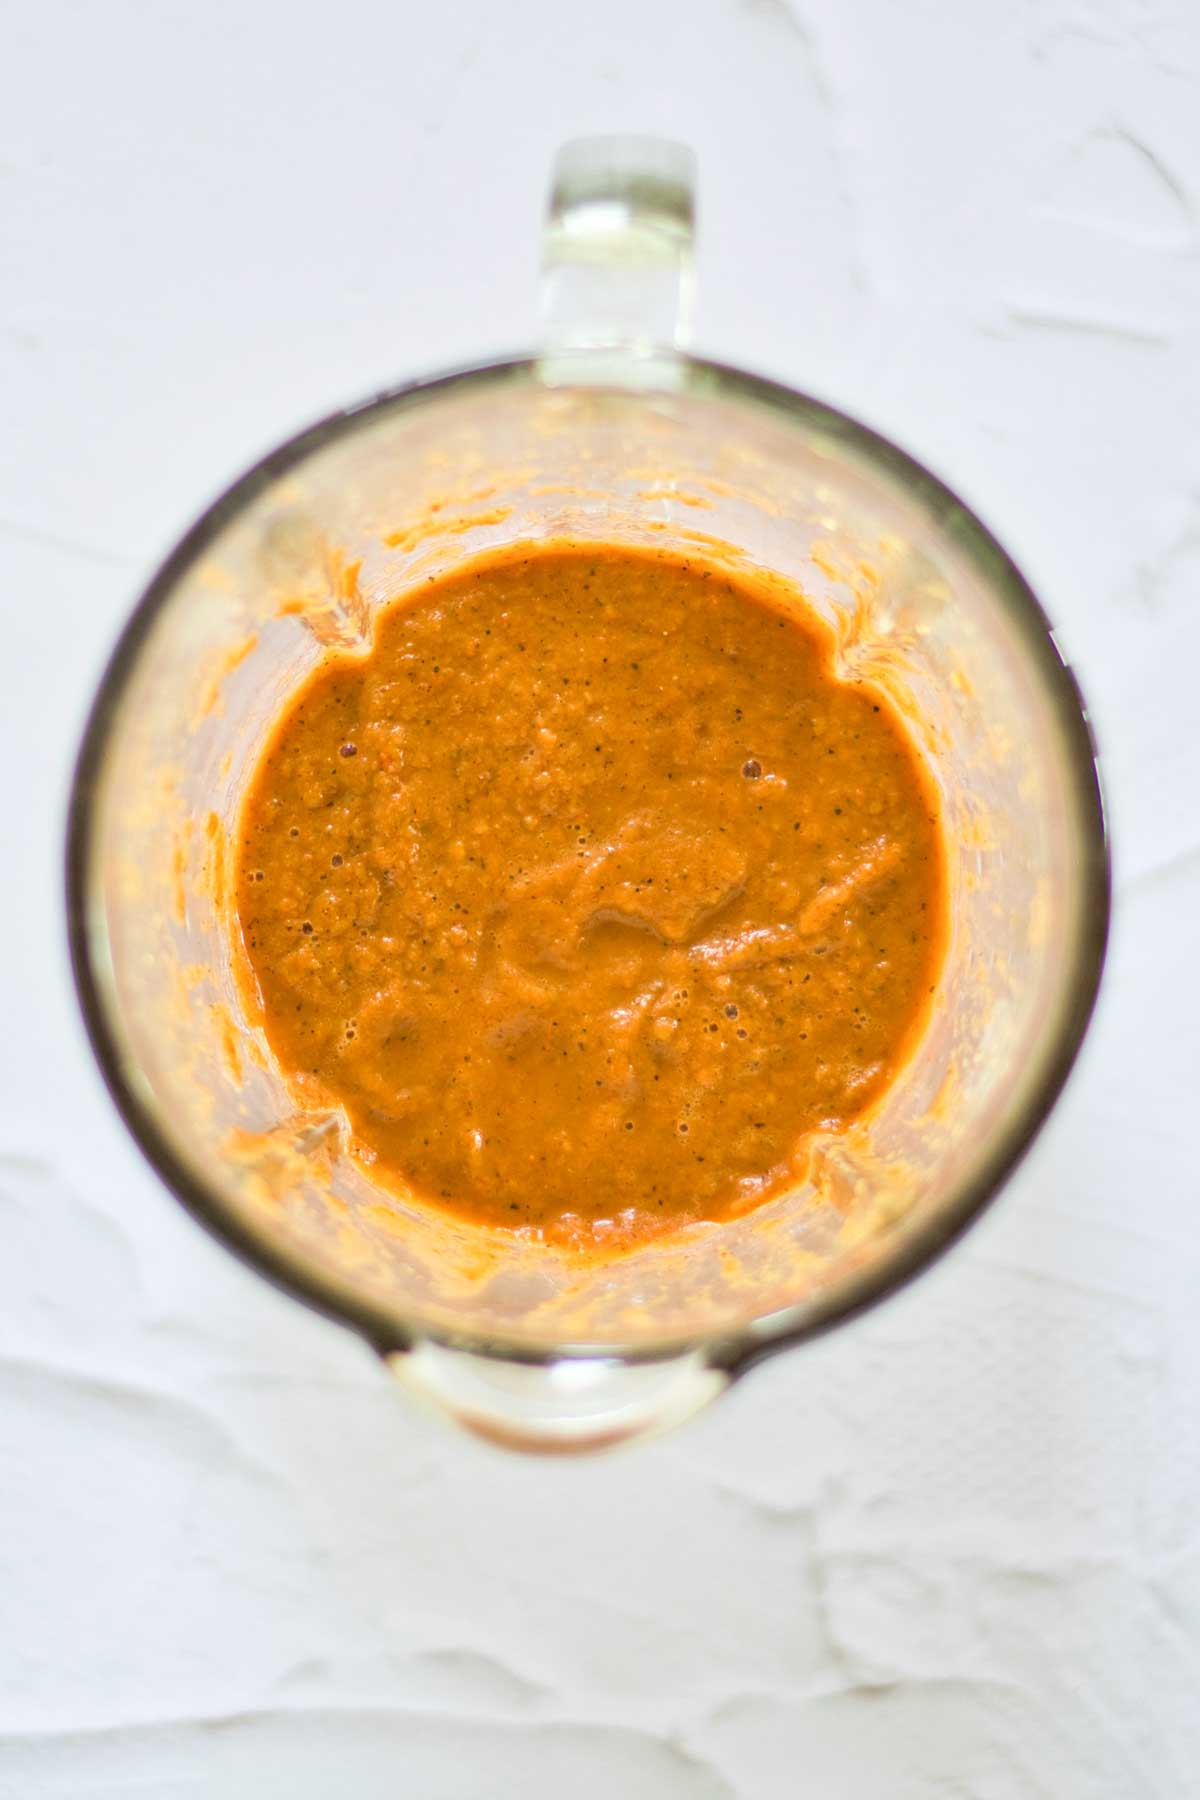
Step 5: Blend the sauce until all the ingredients are thoroughly mixed. (Taste your salsa and adjust the flavour by adding more salt & pepper, spices, etc).

A jar of homemade Salsa Roja Mexican Salsa.

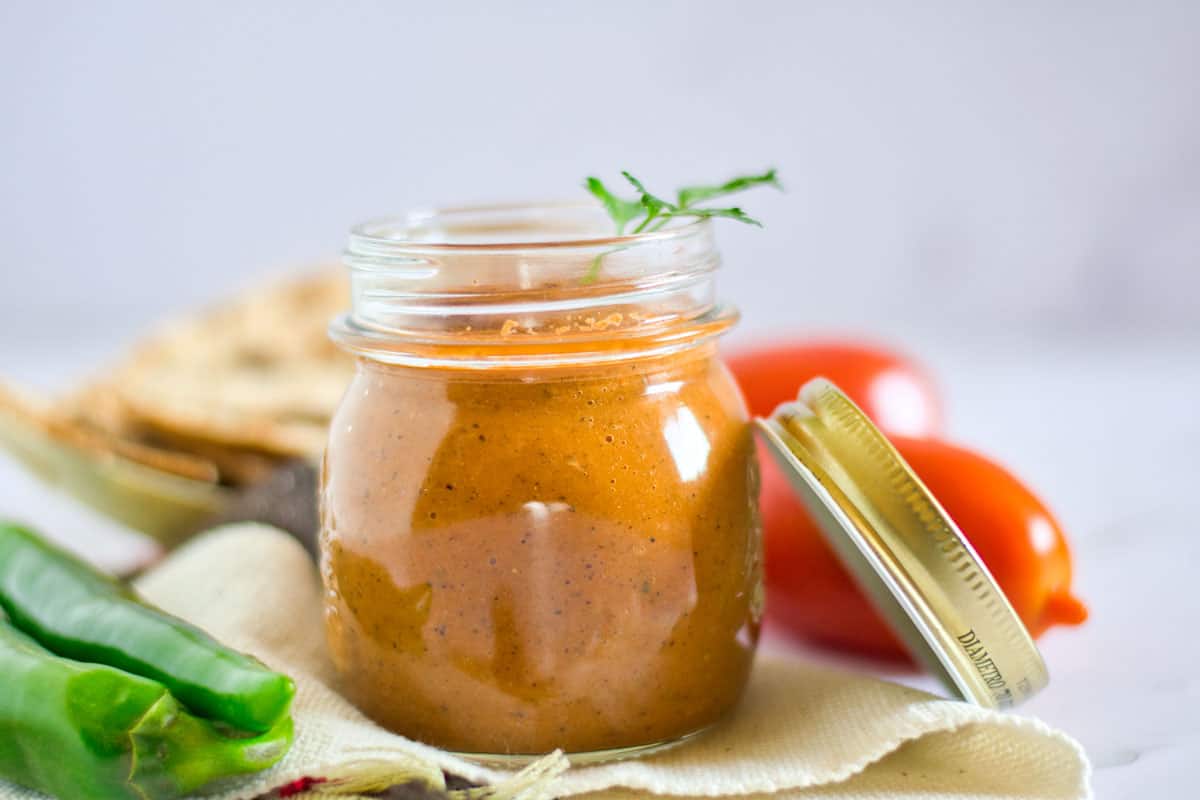
Step 6: Place the sauce into a bowl to serve or jars for storing or transporting.

Expert Tips

Use Fresh Ingredients: The key to good salsa roja is to use the best fresh ingredients you can get. There are no complex techniques or secrets; this is one of those wonderful dishes where the simplicity of the dish makes it sing.

Storage: This Mexican sauce can be kept in the fridge for about a week. If you like to store your sauce to use later, let it completely cool and store in airtight jars that have been sterilized as you would for jams or relishes. You can find different techniques for sterilising jars here. Stored this way, your salsa will keep for up to 4 months unopened.

How to Serve Salsa Roja

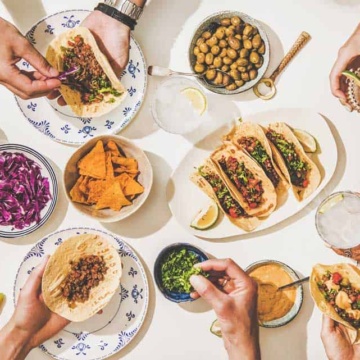
  • The beauty of this tasty little sauce is not just its simplicity but its versatility. Serve it simply as a dip with soft tortilla bread or corn chips.
  • It’s a go-to sauce for a DIY taco or tortilla spread.
  • I love it as a dipper with Mushroom Quesadillas or my bite-size Cauliflower Hash Browns.
  • Serve it with BBQ chicken or fish kebab sticks or as a spicy accompaniment to frittatas or any egg-based dish such as Huevos Rancheros. The possibilities are endless.

Related Recipes 

  • Flat lay of people helping themselves to Mexican picnic food.
    Mexican Picnic Food & Ideas
  • a bowl of Red pepper hummus with bread crackers and carrot sticks.
    Roasted Red Pepper Hummus with Chipotle
  • Raw veggie wraps cut in half showing fillings.
    Raw Veggie Wraps with Avocado
  • A plate of freshly cooked mushroom quesadillas with dipping sauces.
    Easy Mushroom Quesadillas

Did you try this Salsa Roja? 

Please leave me a ⭐ rating below and let me know in the comments how you enjoyed it.

A hand dipping a piece of flatbread into a jar of salsa roja, garnished with a sprig of parsley.

Mexican Salsa Roja

Kate O’Malley
Salsa Roja is a simple, versatile, and flavorful dish that's easy to make with just a few fresh ingredients. It's a great complement to many dishes.
5 from 2 votes
Print Recipe Pin Recipe
Prep Time 10 minutes mins
Cook Time 15 minutes mins
Total Time 25 minutes mins
Course Appetizer, Dip, Side Dish
Cuisine Mexican
Servings 7 People
Calories 18 kcal

Ingredients
  

  • 2 tablespoons olive oil or canola oil
  • 4 medium Roma tomatoes
  • 1 small white onion
  • 2 cloves garlic
  • 2 medium chilies - deseeded
  • 1 teaspoon oregano
  • ¼ teaspoon salt or to taste
  • ¼ teaspoon pepper or to taste

Instructions
 

  • Wash, dry, and prepare all your ingredients for the sauce. Remove the seeds from the chilies.
  • Add oil to a skillet and preheat to medium-high. Add the tomatoes to the pan first, followed by the chilies, garlic, and onion.
  • Pan-fry all the ingredients, turning them until they soften and blacken (Only blacken the outer layer of the ingredients). You can also do this step on a BBQ grill.
  • Once the ingredients have softened and the outer layer blackened, transfer them to a blender or a food processor. (You may want to add the chilies incrementally to ensure your desired heat levels).
  • Add salt, pepper, and oregano (Add any additional spices or herbs such as cilantro now).
  • Blend the sauce until all the ingredients are thoroughly mixed. (Taste your salsa and adjust the flavor by adding more salt & pepper, spices, etc.).
  • Place the sauce into a bowl to serve or jars for storing or transporting.

Notes

Recipe Variations 
  • Chili: Some people like to add two types of chilies for depth of flavor – dried Arbol chiles and jalapeños are a popular mix for a pop of heat with a splash of freshness. Some like to use dried only over fresh.
  • Additional Acid: Add lemon or lime juice if you like your salsa roja a little tarter. I find that the tomatoes add enough acid, but it’s not unusual to add lemon.
  • Cilantro: While I have not included it in this recipe, fresh cilantro is another popular addition. It’s a contentious herb with a love-it-or-hate-it reputation, but feel free to throw in a small handful of fresh leaves.
Expert Tips
  • Use Fresh Ingredients: The key to good salsa roja is to use the best fresh ingredients. There are no complex techniques or secrets; this is one of those wonderful dishes where the simplicity makes it sing.
  • Storage: This Mexican sauce can be kept in the fridge for about a week. If you like to store your sauce for later use, let it completely cool and store it in sterilized airtight jars, as you would for jams or relishes. Stored this way, your salsa will keep for up to four months unopened.

Nutrition

Serving: 1gCalories: 18kcalCarbohydrates: 4gProtein: 1gFat: 0.2gSaturated Fat: 0.03gPolyunsaturated Fat: 0.1gMonounsaturated Fat: 0.02gSodium: 87mgPotassium: 148mgFiber: 1gSugar: 2gVitamin A: 423IUVitamin C: 24mgCalcium: 14mgIron: 0.4mg
Tried this recipe?Mention @picniclifestyle or leave a comment below.

More Easy Picnic Dips for Every Season

  • A bowl of buffalo cauliflower dip garnished with sliced green onions, placed on a wooden board, with celery and carrot sticks in a cup nearby and additional green onions in a small dish.
    Cauliflower Buffalo Dip
  • A hand dipping a cracker into a bowl of cheesy broccoli dip, with additional crackers in a dish in the background.
    Warm Broccoli Cheese Dip
  • Brightly coloured platter of assorted dips with vegetable skewers.
    Delicious Dips for Charcuterie Boards
  • Bowl of baba Ganoush eggplant dip with pita breads.
    Roasted Eggplant Dip – Baba Ganoush

About Kate O'Malley

Picnic enthusiast, passionate cook, and the creative force behind Picnic Lifestyle. With a globe-trotting background and a keen eye for local ingredients, she's mastered the art of crafting delectable picnics and portable feasts (especially for long travel days). Kate's passion for al fresco dining comes alive in this guide, curating perfect picnics for every occasion.

Reader Interactions

5 from 2 votes (2 ratings without comment)

Leave a Reply Cancel reply

Your email address will not be published. Required fields are marked *

Recipe Rating


Primary Sidebar

A woman in a blue vest standing in front of trees with blue lights.

Meet Kate, the unrivaled picnic fanatic who loves nothing more than to whip up a portable feast.

More about me →

Download Your Free Picnic Checklist

  • A picnic setup on a grassy area with a woven basket, two wine glasses, a bottle of wine, a corkscrew, a cutting board with cutlery, and a gray cloth.
    The Ultimate Picnic Checklist
Shop My Favourite Picnic Products at My Amazon Storefront

Summer Picnic Ideas

  • Summer picnic spread with chicken, hummus and coleslaw.
    Simply Perfect Summer Picnic Food Ideas
  • A collage of four vibrant, healthy dishes, each featuring a variety of vegetables, grains, and garnishes.
    Fresh Summer Salads for a Picnic
  • A picnic scene with two sandwiches wrapped in cloth, coleslaw on a plate, and a knife on a wooden cutting board, all atop a pink cloth.
    Summer Sandwiches for a Picnic
  • A collage of four chicken picnic dishes: a chicken baguette with figs and cheese, chicken balls on toothpicks, chicken wraps with salad, and finger sandwiches tied with chives.
    Easy Chicken Picnic Recipes
  • A colorful beetroot and orange salad with walnuts, cheese, and greens, served with a fork on the side.
    Salads With Fruit and Nuts for Every Season
  • Attractive couple enjoying a picnic with friends on the beach.
    Beach Picnic Ideas for Fuss-free Beach Days
See more Summer Picnic Ideas →

Popular Posts

  • 21 Best Picnic Games to Keep Everyone Entertained
  • A picnic setup on a white blanket with sliced melon, watermelon, pomegranate seeds, croissants, juice, and bowls of blackberries and raspberries.
    Breakfast Picnic Ideas to Get Up Early For
  • A picnic setup with croissants, watermelon, grapes, olives, cheese, salami, and two glasses of white wine on a table. A wicker basket is in the background.
    Delicious No Cook Picnic Food Ideas
  • A split image showing powdered sugar-dusted muffins on the left and strawberry rice crispy treats stacked on the right.
    20 Picnic Desserts That Don’t Need Refrigeration
  • Stacked chicken salad sandwiches with crusts removed on a wooden board, garnished with fresh herbs.
    Chicken Salad Tea Sandwiches
  • Group of people enjoying a beach picnic with lots of food laid out on a picnic blanket.
    How to Keep Food Cold at a Picnic

Footer

↑ back to top

Terms

  • Privacy Policy
  • Disclaimer
  • Accessibility

Newsletter

  • Sign Up! for emails and updates

Contact

  • Contact
  • About

Disclaimer – Picnic Lifestyle participates in the Amazon Services LLC Associates Program, an affiliate advertising program designed to provide a means for us to earn fees by linking to Amazon.com and affiliated sites. Many posts on this site also contain links to other affiliate sites offering products or services we recommend. This means if you make a purchase after clicking on a link, we may earn a small commission at no extra cost to you.

Copyright © 2020-2025 Picnic Lifestyle

Rate This Recipe

Your vote:


A rating is required
A name is required
An email is required

Recipe Ratings without Comment

Something went wrong. Please try again.