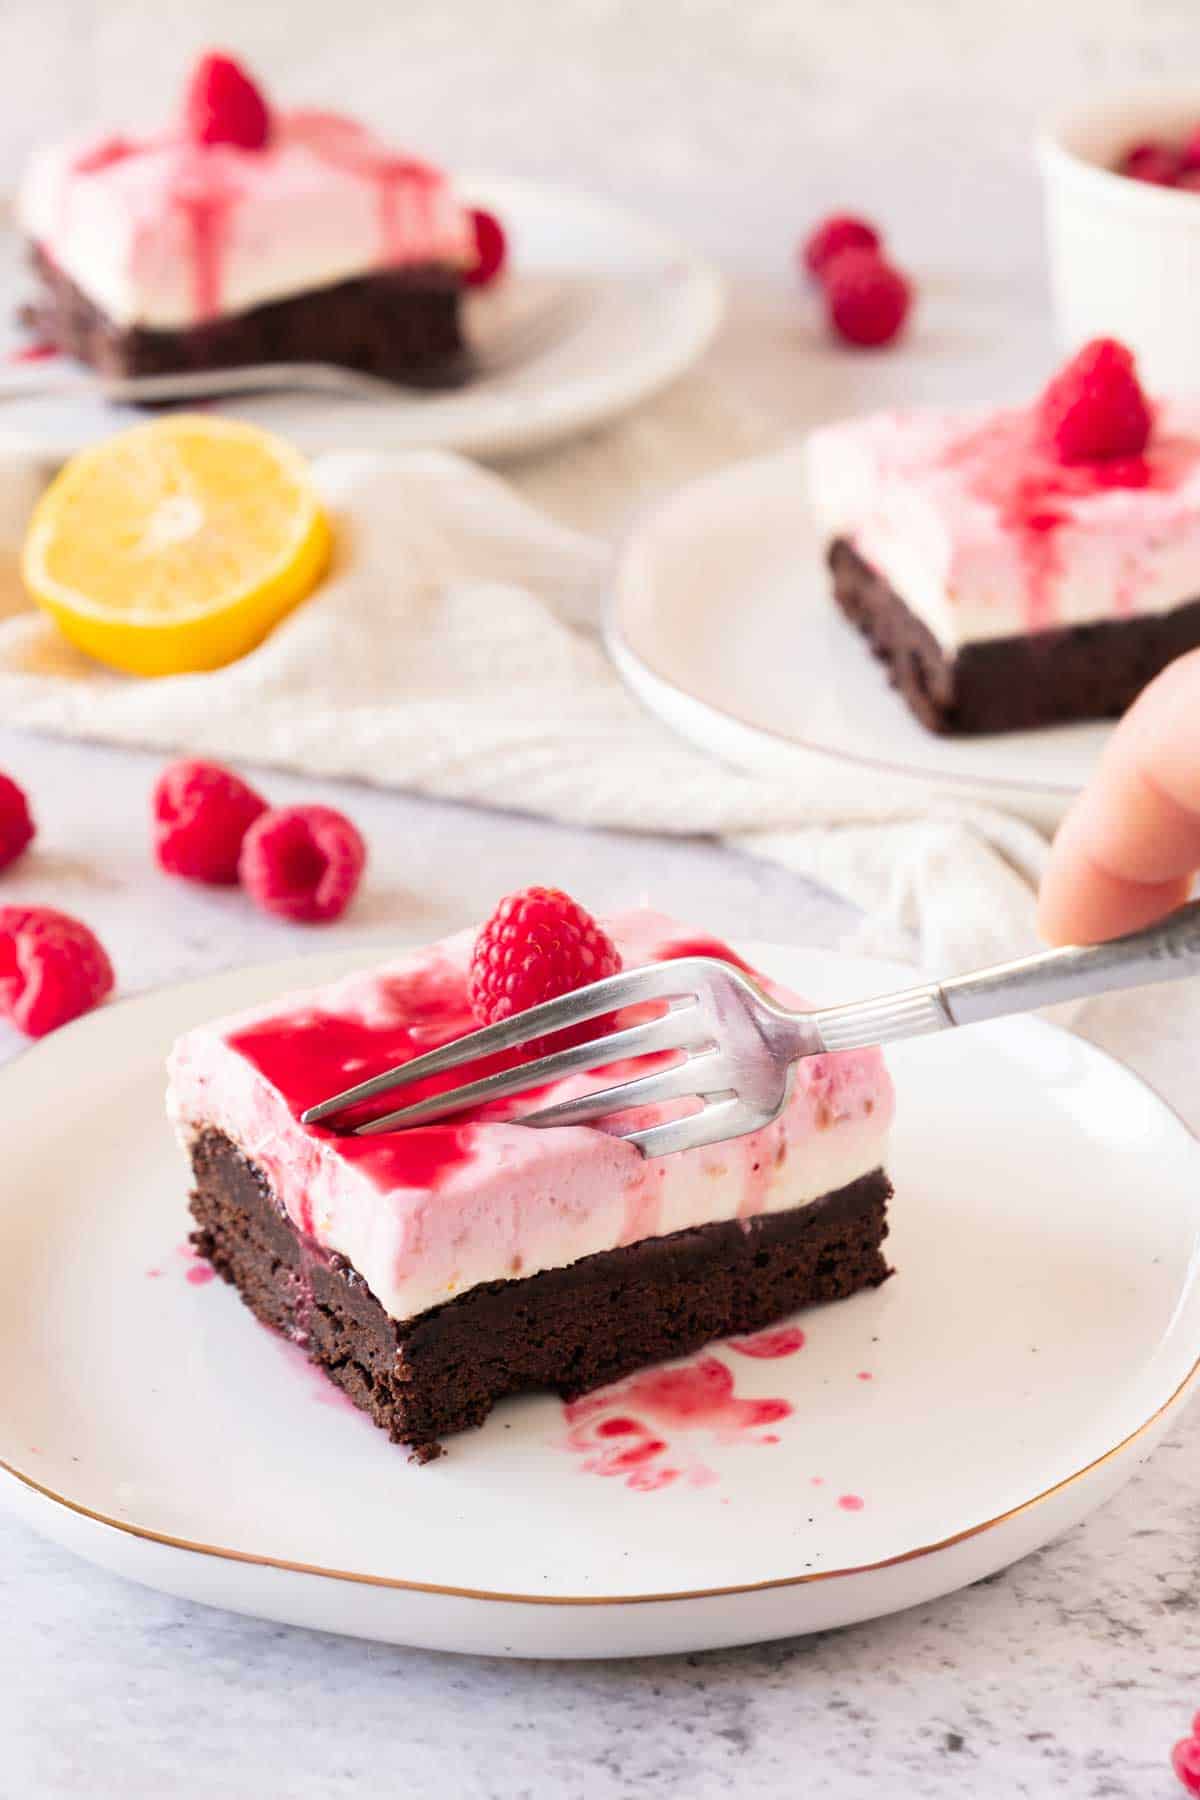
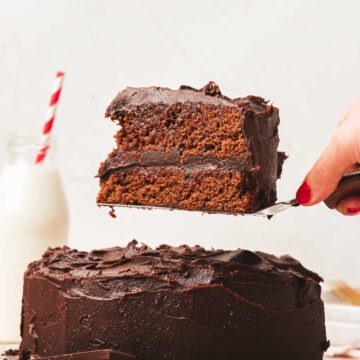
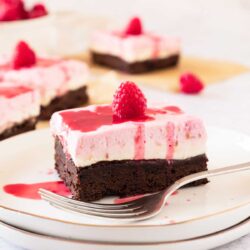
There’s no better way to jazz up a brownie than to top it with lush, no-bake cheesecake.
While brownies and cheesecake are heroes in their own right, raspberries go so well with both, why not bring them together in these delightful Raspberry Cheesecake Brownies?
Jump to:
Why I Love This Recipe
As with my Raspberry Cupcakes With Lemon Mascarpone Frosting, raspberries bring a burst of freshness to the recipe. This is also one of those unique brownie recipes you can make for special occasions, as it has that extra bit of flair. It’s a definite winner for a romantic Valentine’s Day Picnic (thank me later).
While this recipe may seem like it has a lot of moving parts, it’s very easy to make – most of the process is chilling time. It’s also a very portable way to serve cheesecake at a picnic.
You can make these cheesecake brownies up to 2 days in advance and refrigerate until ready to cut and serve.
Ingredient Notes
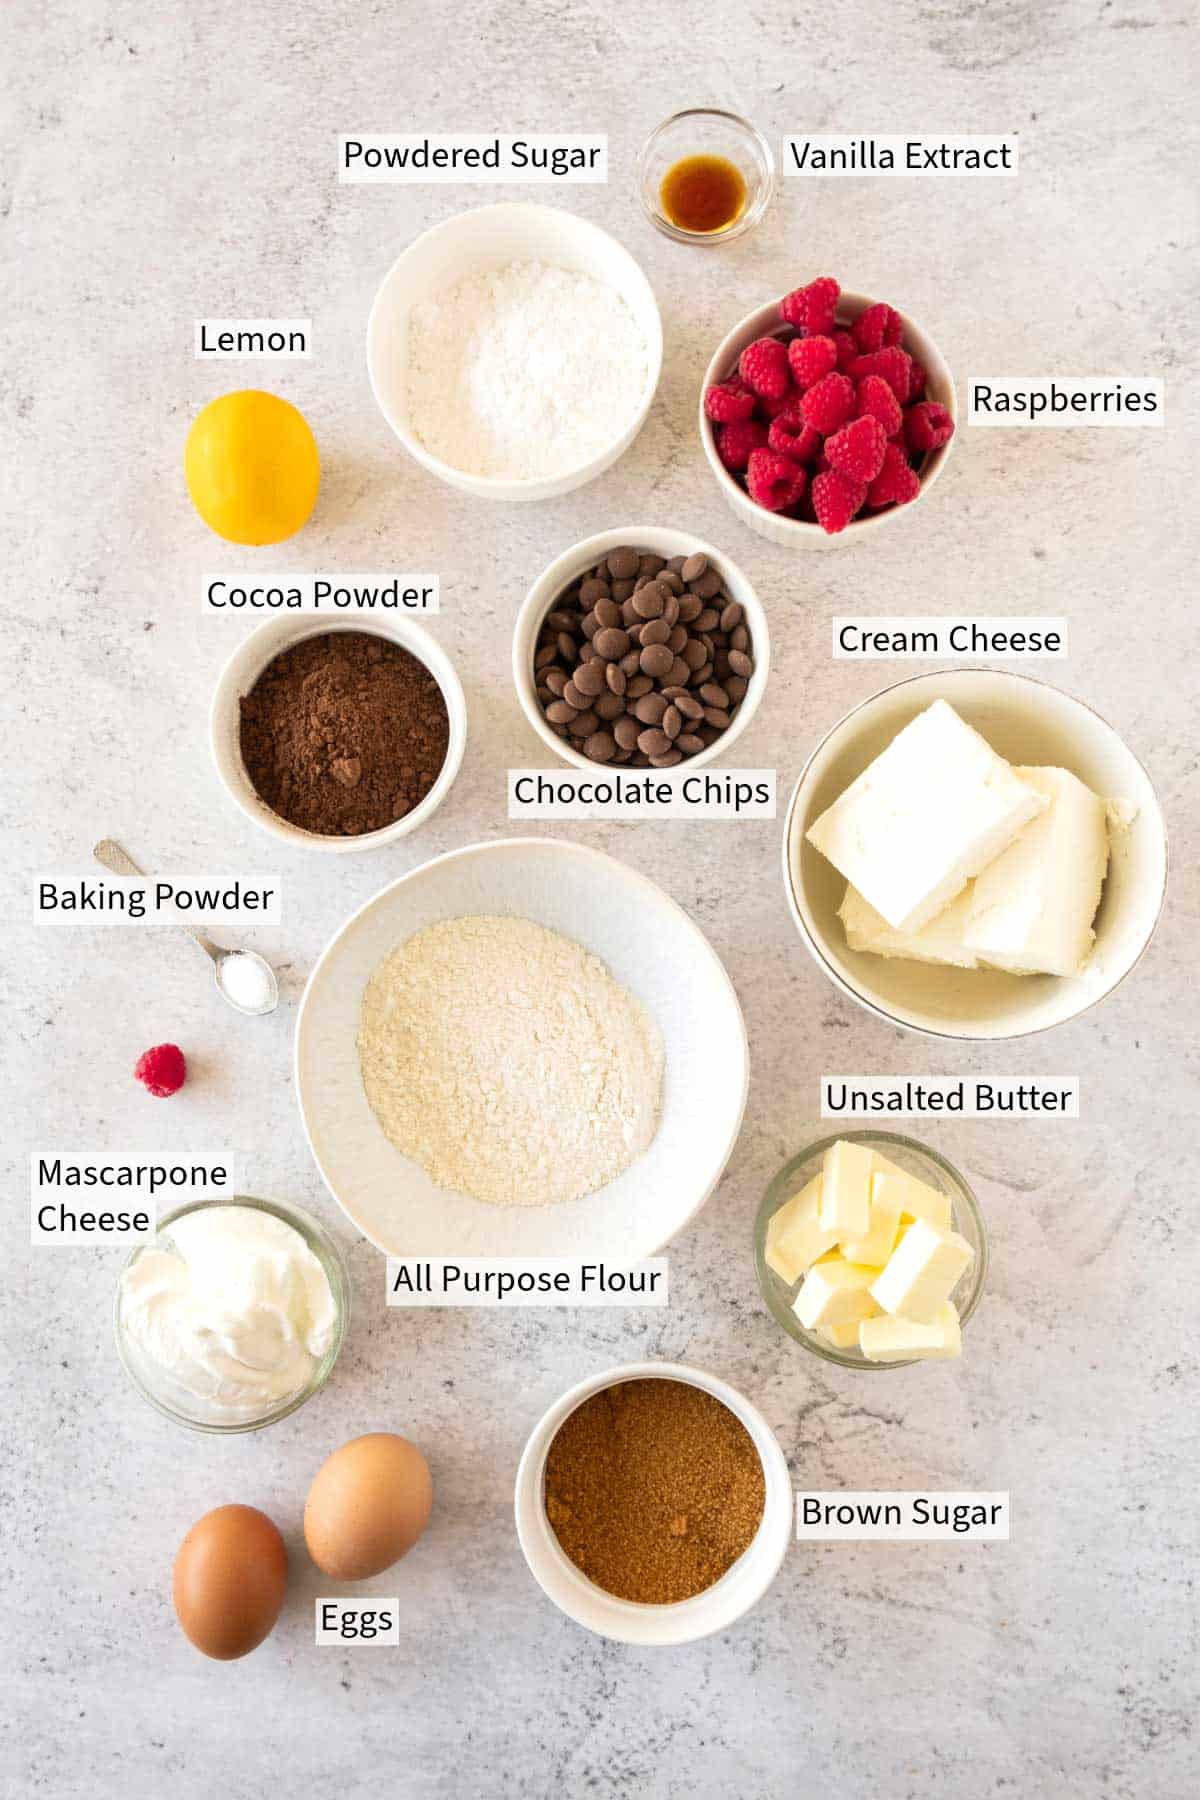
See my recipe card below for a complete list of the ingredients with measurements and notes.
Recipe Variations and Substitutions
Raspberries: If raspberries are out of season, frozen raspberries would be a good choice for the compote recipe given here. Alternatively, you could use store-bought raspberry compote (please use a quality one).
Chocolate Adjustments: Depending on your chocolate intensity preference, you can use dark, semi-sweet, or milk chocolate chips in the brownie batter and adjust the cocoa powder type (natural or Dutch-process) to alter the flavor and color.
Step by Step Instructions
Step 1: Preheat the oven to 350F.
Line a 10 x 10 brownie pan with parchment paper.
Make the Brownie Base
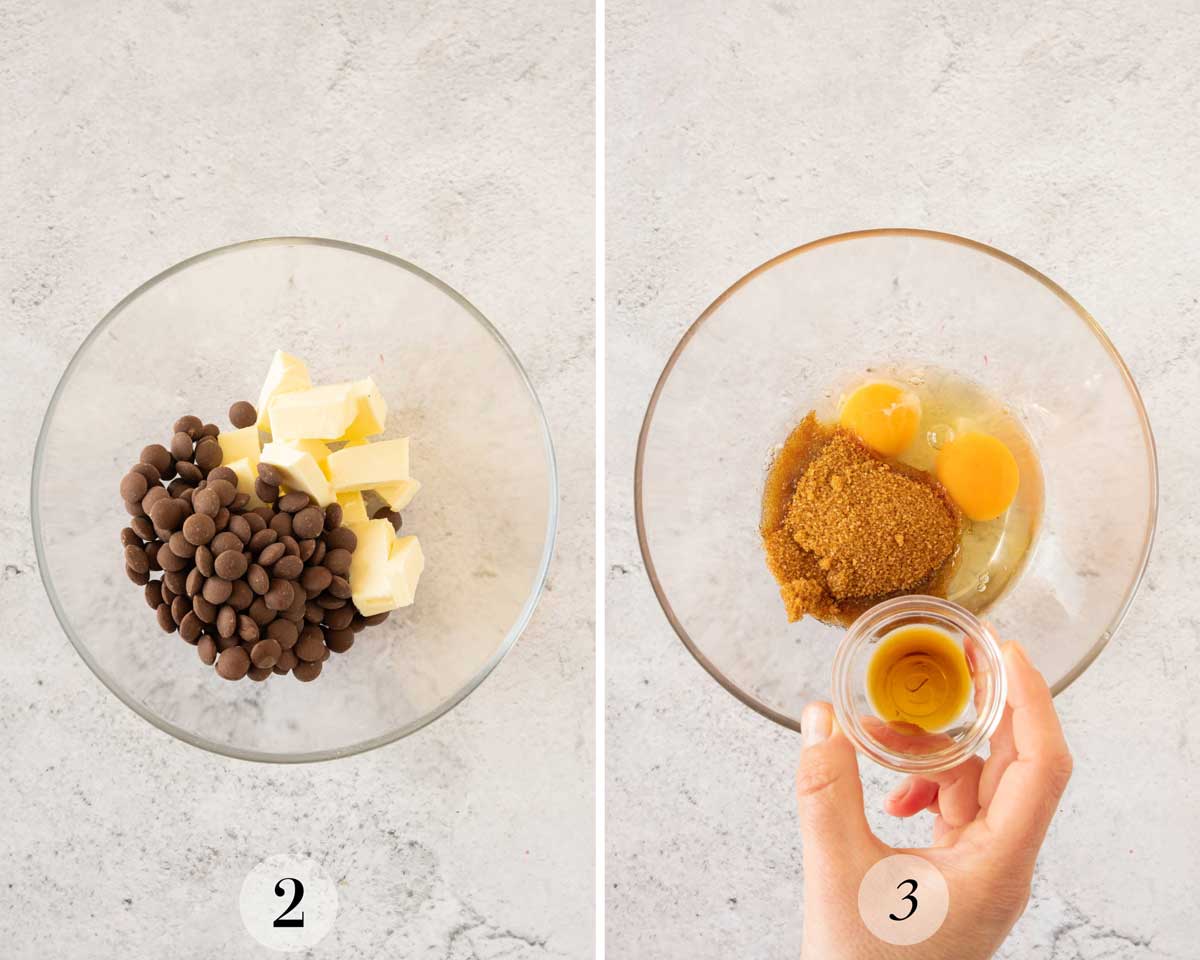
Step 2: Melt the chocolate chips and butter in an ovenproof bowl in the microwave on medium-low for 25-40 seconds. Stir intermittently to ensure they are combined and don’t burn.
Step 3: In a large bowl, mix the eggs, sugar, and vanilla. Beat well until bubbles form on top of the mixture.

Step 4: Mix in the melted butter and chocolate until the ingredients are combined.
Step 5: Sift the flour with the baking powder, cocoa, and a pinch of salt.
Add the dry ingredients to the wet.
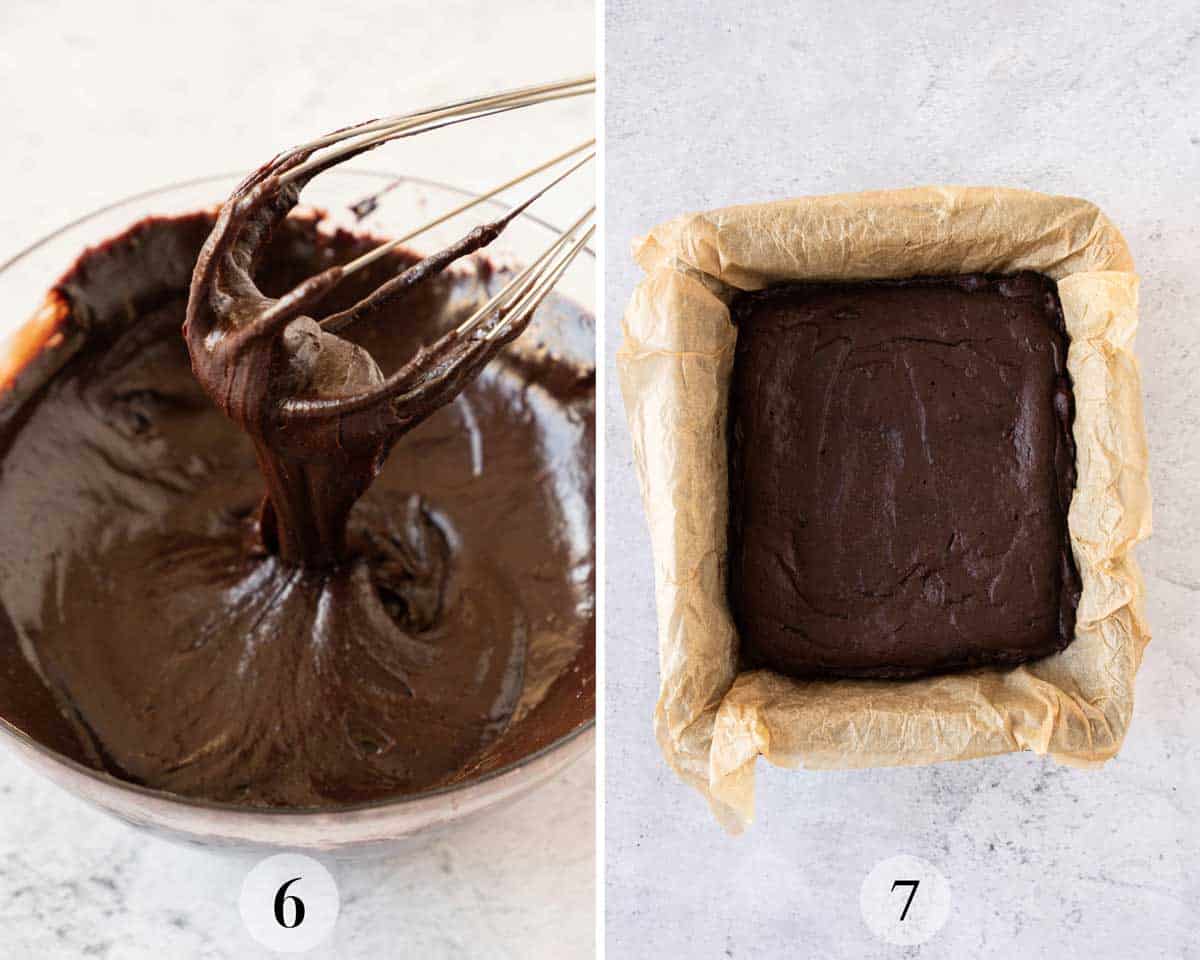
Step 6: Mix well until everything is combined and you have a firm, smooth batter.
Step 7: Pour the brownie batter into the pre-prepared tin. Ensure it is evenly spread.
Bake for 20-25 minutes. Test with a toothpick for doneness. Put aside to cool.
Make the Cream Cheese and Raspberry Topping
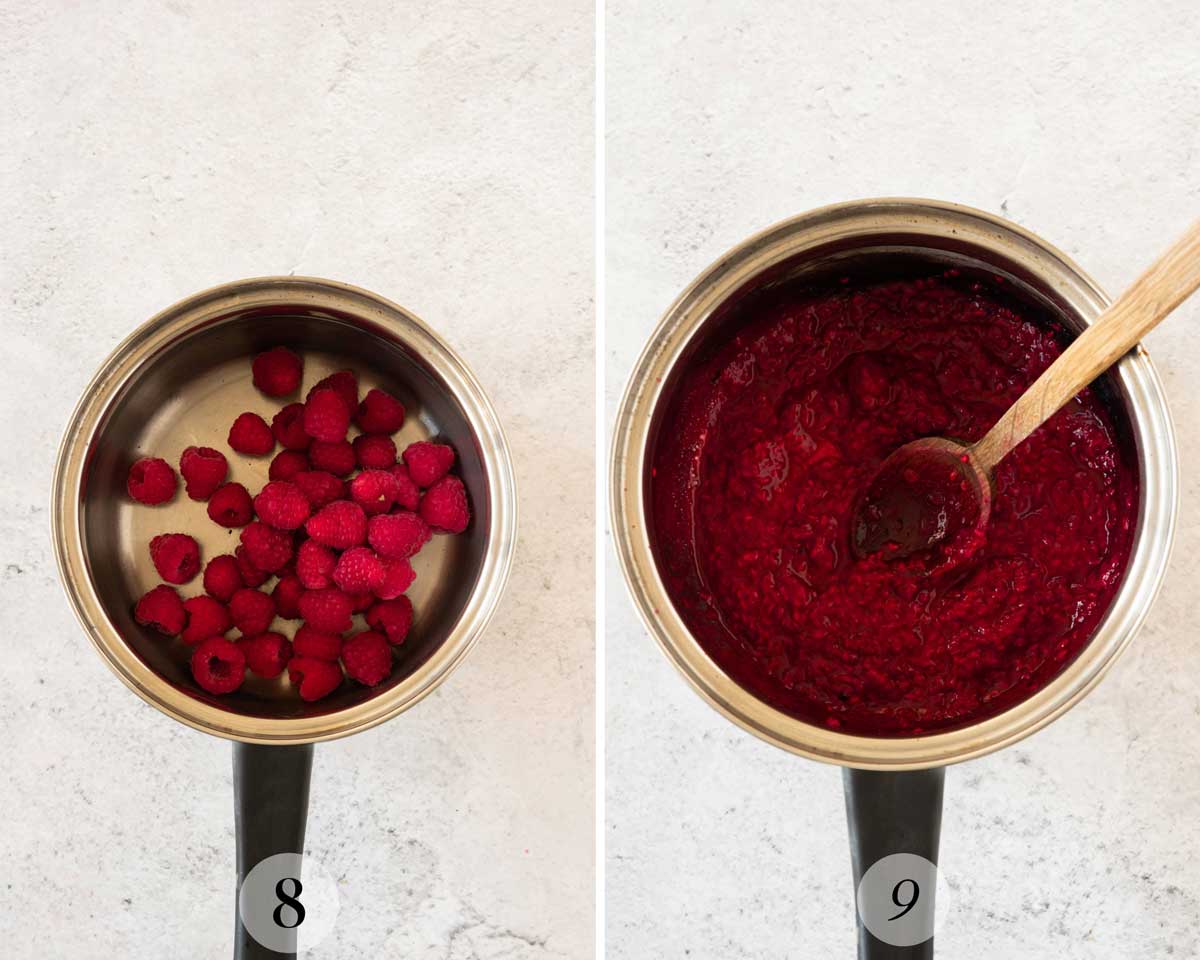
Step 8: Add the raspberries and 1 ½ tablespoons of the powdered sugar in a small saucepan.
Step 9: Cook over low heat, stirring, until they soften and release their juice.
Remove from heat and set aside until completely cool.
Strain 2 tablespoons of the raspberry mixture and set the juice aside to drizzle on the brownies later.
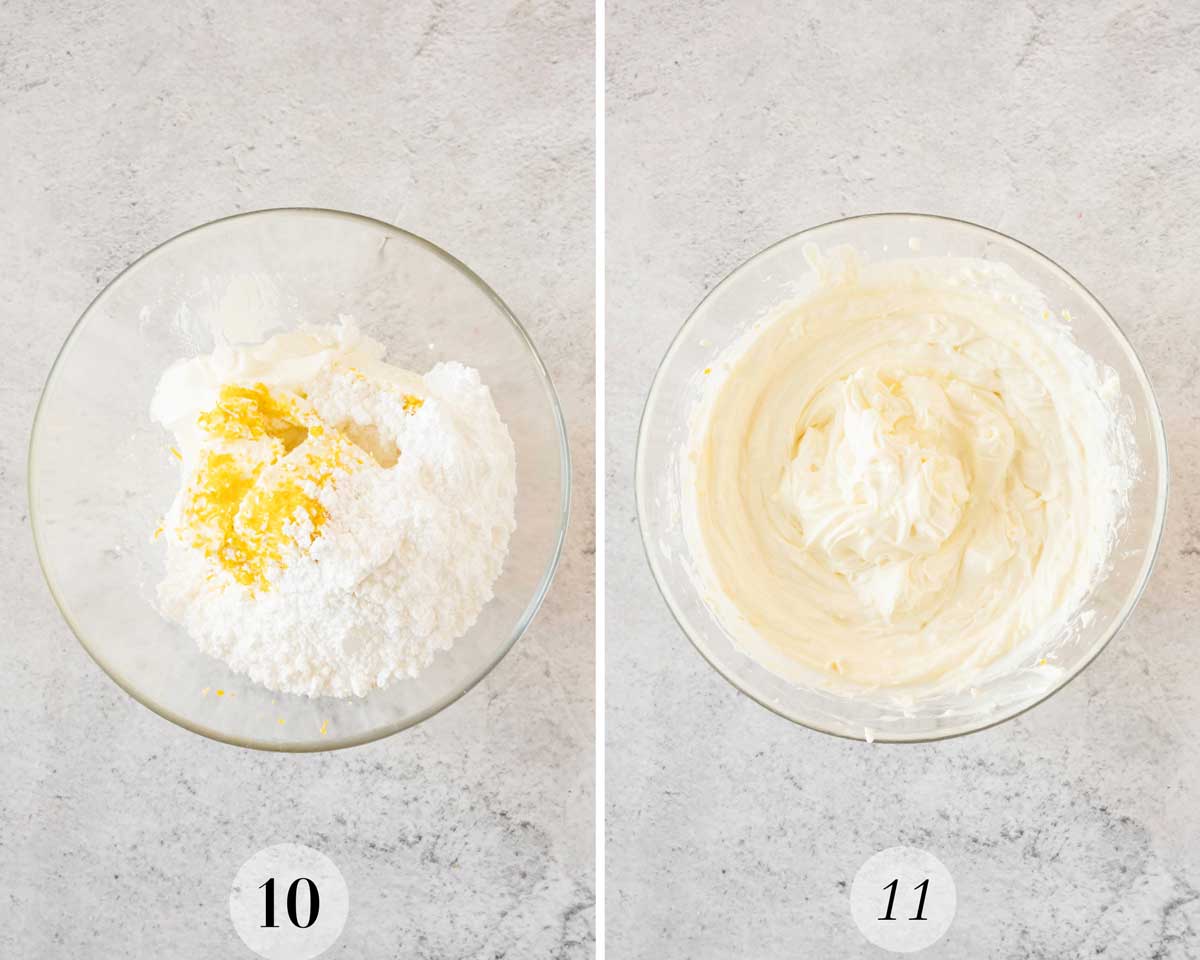
Step 10: In a medium-sized bowl, mix the cream cheese, mascarpone, powdered sugar, and lemon zest.
Step 11: Beat with a hand mixer until you have a smooth, firm mixture with peaks.
Divide this mixture in half and place one-half in the refrigerator for 30-40 minutes.

Step 12: Add the cooled raspberry pulp to the other half.
Step 13: Stir well until the ingredients are combined. Refrigerate it also for 30-40 minutes.
Assemble The Cheesecake Brownies
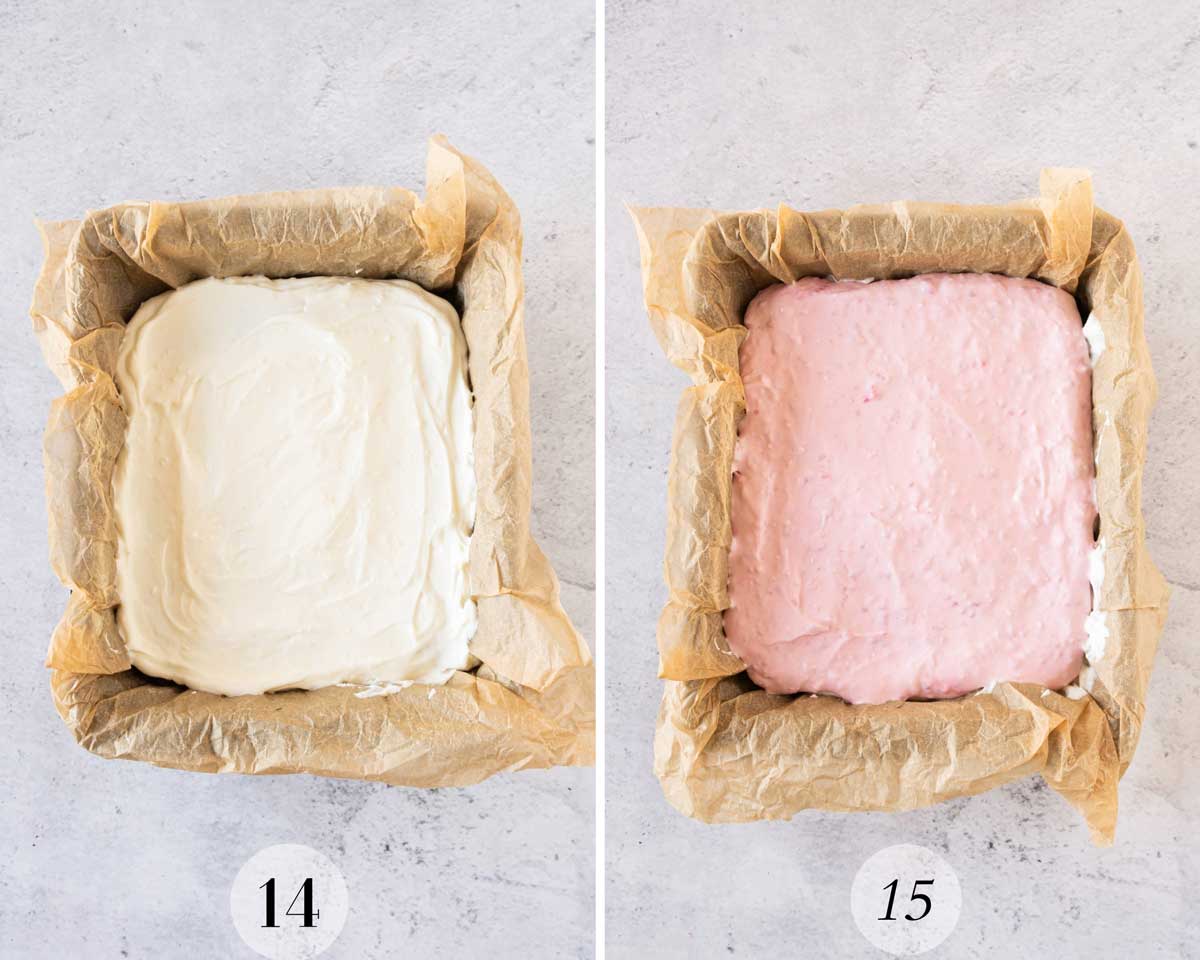
Step 14: Once the brownie base has completely cooled, spread the plain cream cheese mix over it with a spatula. Let it set in the fridge for 30-40 minutes.
Step 15: Once the first layer has set, gently spread the raspberry cream cheese on top with a spatula and refrigerate again for 2-3 hours or overnight.

Step 16: Once all the layers have set, cut them into squares. Before serving, drizzle with the raspberry syrup you reserved and garnish with fresh raspberries.
Recipe FAQs
Yes, you can. Follow the Raspberry Cheesecake Brownie recipe here, substituting the brownie batter for the boxed one.
As this recipe uses a no-bake cheesecake on top, you should store these cheesecake brownies in an airtight container in the fridge. They will keep for up to 5 days.
Yes, you can. I would recommend first freezing the individual squares on a baking sheet before wrapping them in foil or baking paper and storing them in an airtight freezer bag or container. Pre-freezing them helps prevent squashing the cheesecake layer. Freezing them in squares instead of the whole pan (which you can also do) means you can defrost as many as you need. They will keep in the freezer for up to 3 months. Defrost them in the fridge overnight.
Expert Tips
Room Temperature Ingredients: Refrigerated ingredients such as cheese, eggs, and butter should be at room temperature to achieve a smoother cheesecake batter and a more uniform brownie texture.
Cooling and Chilling: Don’t rush any of the chilling processes. Allow the brownie to cool completely at room temperature before chilling it in the fridge. You don’t want to melt the cheesecake layer on a warm brownie base. Also, allow the cheesecake layers to chill completely before adding the next. This way, you will have a nice layering between the plain and raspberry cheesecake.
Cut When Cold: Cut the brownies into squares straight from the fridge. For clean slices, use a thin, sharp knife dipped in hot water.
Serve Chilled: As with any cheesecake, serve slightly chilled cheesecake brownies. See my tips for keeping food cold to ensure your cheesecake stays at the right temperature for a picnic.
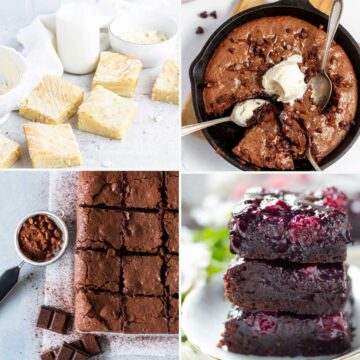
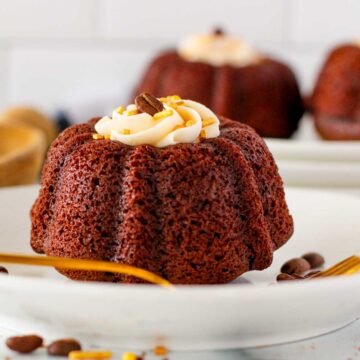
Related Recipes
Did you try these Raspberry Cheesecake Brownies?
Please leave me a ⭐ rating below and let me know in the comments how you enjoyed them.
Raspberry Cheesecake Brownies
Ingredients
Chocolate Brownies
- 1 cup chocolate chips
- 1 cup unsalted butter - room temperature
- 2 eggs - room temperature
- 1 cup brown sugar
- 1 teaspoon vanilla extract
- 1 cup all–purpose flour
- ¼ tablespoon cocoa powder
- 1 pinch salt
- 1 teaspoon baking powder
Raspberry Compote
- 1 ⅓ cup fresh raspberries - Plus additional for garnishing
- 1 ½ tablespoons powdered sugar
Cheese Cake Topping
- 2 ½ cups cream cheese - room temperature
- 1 cup Mascarpone - room temperature
- ⅔ cup powdered sugar
- 2 tablespoons lemon zest
Instructions
Make the Brownie Base
- Preheat the oven to 350F.
- Line a 10 x 10 brownie pan with parchment paper.
- Melt the chocolate chips and butter in an ovenproof bowl in the microwave on medium-low for 25-40 seconds. Stir intermittently to ensure they are combined and don’t burn.
- In a large bowl, mix the eggs, sugar, and vanilla. Beat well until bubbles form on top of the mixture.
- Mix in the melted butter and chocolate until the ingredients are combined.
- Sift the flour with the baking powder, cocoa, and a pinch of salt. Add the dry ingredients to the wet.
- Mix well until everything is combined and you have a smooth batter.
- Pour the brownie batter into the pre-prepared tin. Ensure it is evenly spread.
- Bake for 20-25 minutes. Test with a toothpick for doneness.
- Put aside to cool. Once completely cooled at room temperature, place in the fridge to chill a little before topping with the cheesecake mix.
Make the Cream Cheese and Raspberry Topping
- Add the raspberries and 1 ½ tablespoons of the powdered sugar in a small saucepan.
- Cook over low heat, stirring, until they soften and release their juice.
- Remove from heat and set aside until completely cool.
- Strain 2 tablespoons of the raspberry mixture and set the juice aside to drizzle on the brownies later.
- In a medium-sized bowl, mix the cream cheese, mascarpone, powdered sugar, and lemon zest. Beat until you have a smooth, firm mixture with peaks.
- Divide this mixture in half and place one-half in the refrigerator for 30-40 minutes.
- Add the cooled raspberry pulp to the other half. Stir well until the ingredients are combined. Refrigerate it also for 30-40 minutes.
Assemble The Cheesecake Brownies
- Once the brownie base has completely cooled, spread the plain cream cheese mix over it with a spatula. Let it set in the fridge for 30-40 minutes.
- Once the first layer has set, gently spread the raspberry cream cheese on top with a spatula and refrigerate again for 2-3 hours or overnight.
- Once all the layers have set, cut them into squares. Before serving, drizzle with the raspberry syrup you reserved and garnish with fresh raspberries.
Notes
- Raspberries: If raspberries are out of season, frozen raspberries would be a good choice for the compote recipe given here. Alternatively, you could use store-bought raspberry compote (please use a quality one).
- Chocolate Adjustments: Depending on your chocolate intensity preference, you can use dark, semi-sweet, or milk chocolate chips in the brownie batter and adjust the cocoa powder type (natural or Dutch-process) to alter the flavor and color.
- Room Temperature Ingredients: Refrigerated ingredients such as cheese, eggs, and butter should be at room temperature to achieve a smoother cheesecake batter and a more uniform brownie texture.
- Cooling and Chilling: Don’t rush any of the chilling processes. Allow the brownie to cool completely at room temperature before chilling it in the fridge. Also, allow the cheesecake layers to chill completely before adding the next.
- Cut When Cold: Cut the brownies into squares straight from the fridge. Use a thin, sharp knife dipped in hot water for clean slices.
- Serve Chilled: As with any cheesecake, serve slightly chilled cheesecake brownies. See my tips for keeping food cold to ensure your cheesecake stays at the right temperature for a picnic.

Leave a Reply