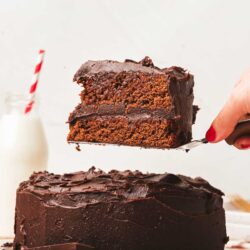
The Matilda Chocolate Cake has achieved an almost pop culture status as one of the best chocolate cakes ever to grace the silver screen.
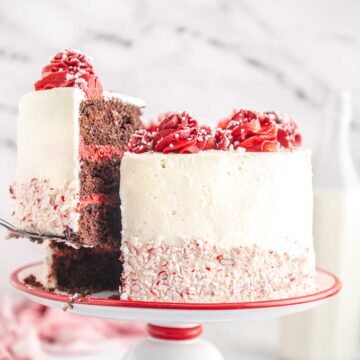
Like my decadent Chocolate Peppermint Cake, this show-stopping delight is easier to make than you might think.
Jump to:
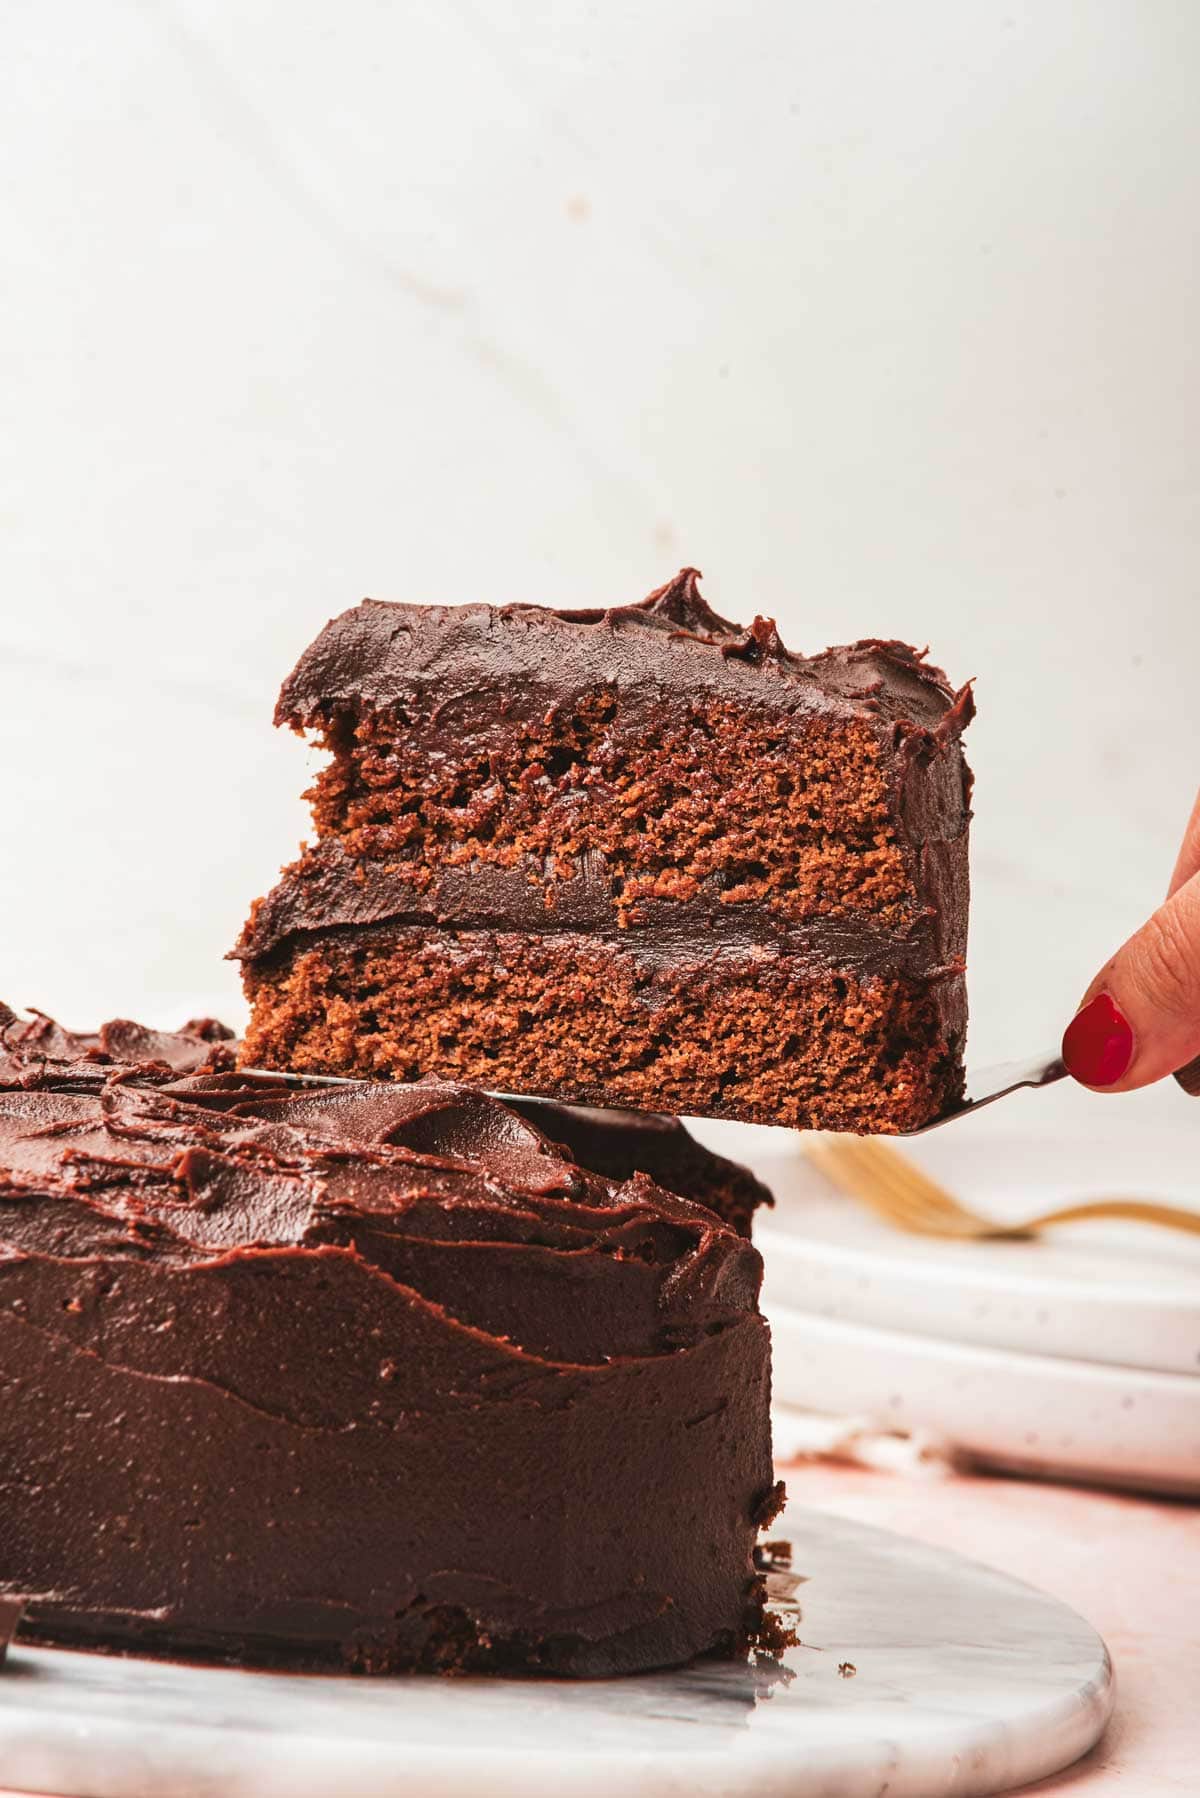
Inspired by the 1996 film “Matilda,” the iconic Matilda Chocolate Cake is a nod to the famous scene where Miss Trunchbull punishes Bruce Bogtrotter by forcing him to eat an entire cake in front of the horrified school.
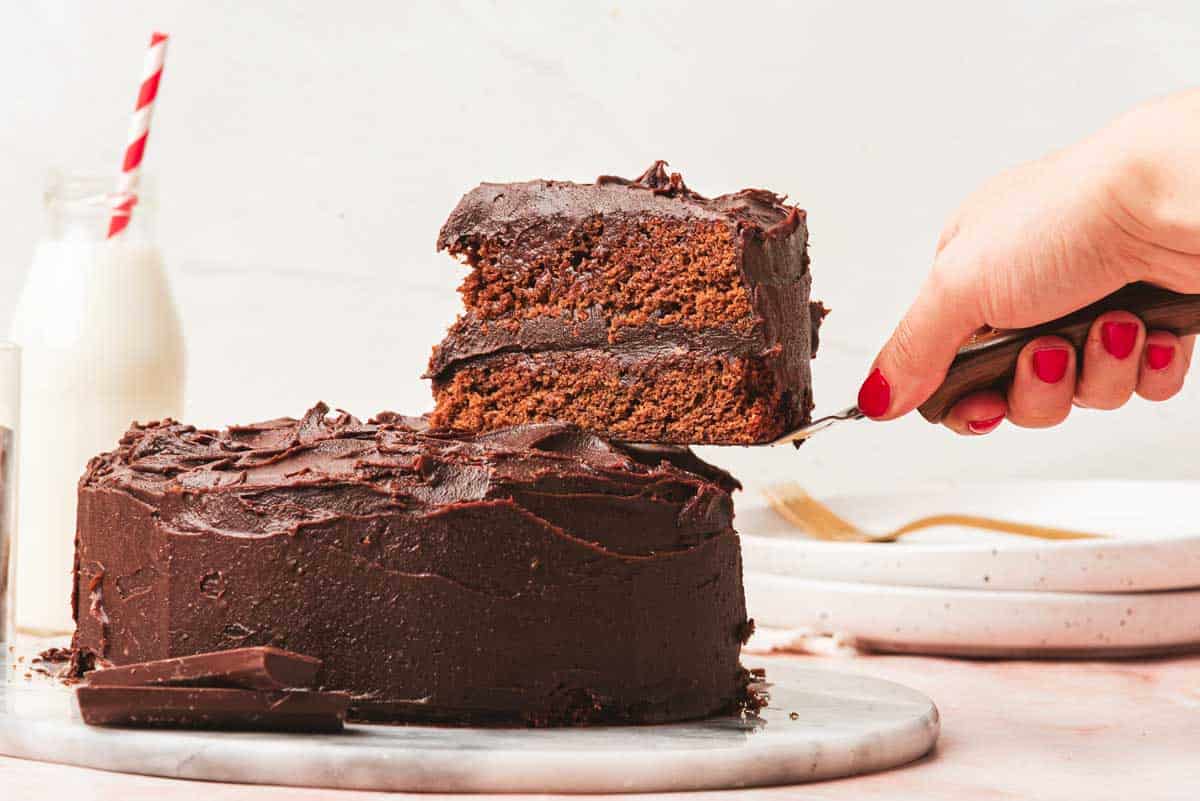
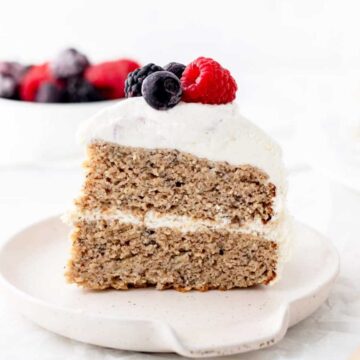
Like Miss Trunchbull’s “Personal Cake”, this Matilda Cake features luxuriously moist chocolate layers draped in a rich, glossy chocolate fudge frosting.
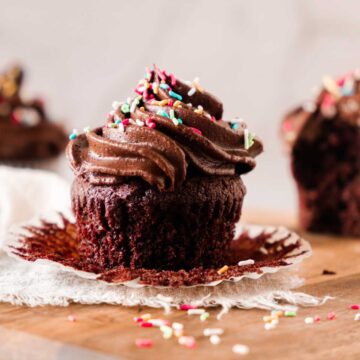
While I like to look to a good brownie recipe or my Double Chocolate Cupcakes for a solid chocolate fix, this lush, layered chocolate cake is the ultimate cake for any occasion, especially as a celebration cake for a Birthday picnic party.
Ingredient Notes
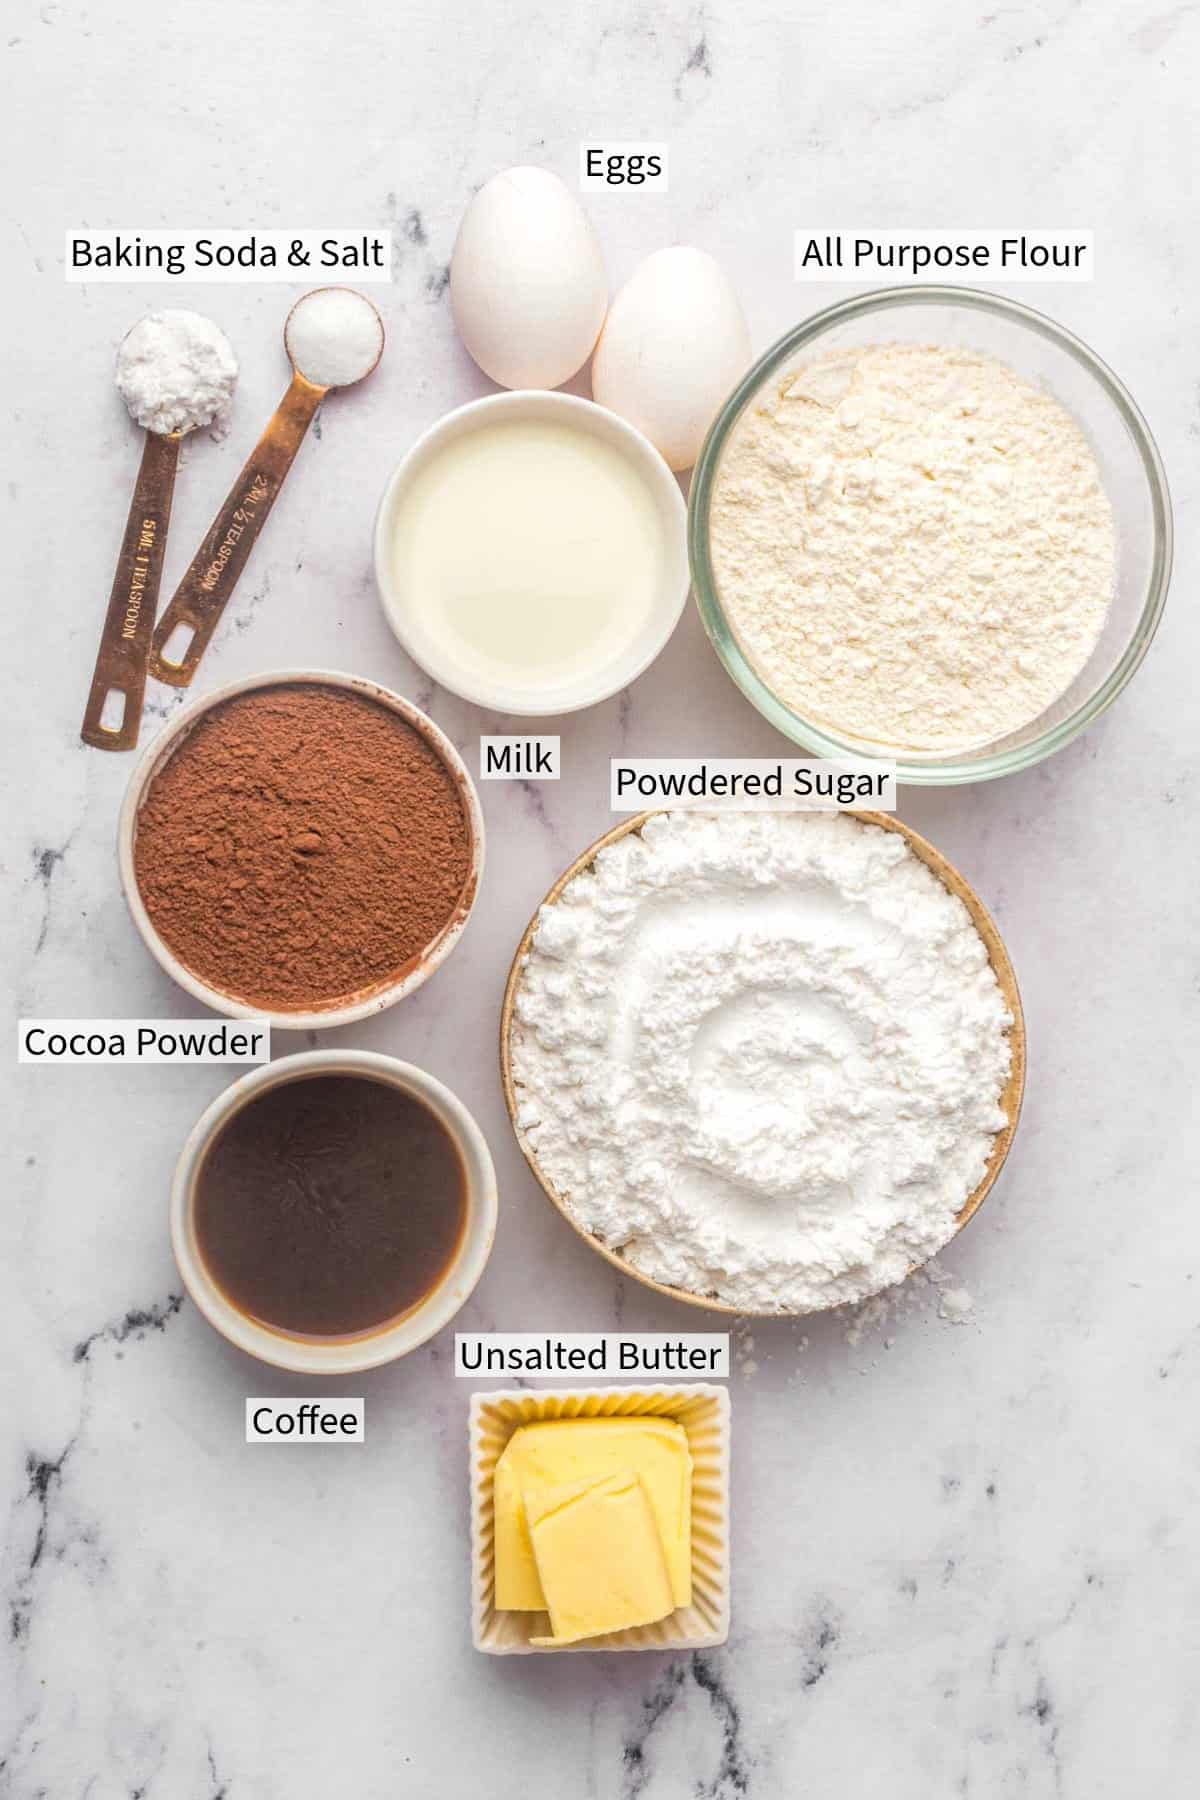
Chocolate Cake Ingredients
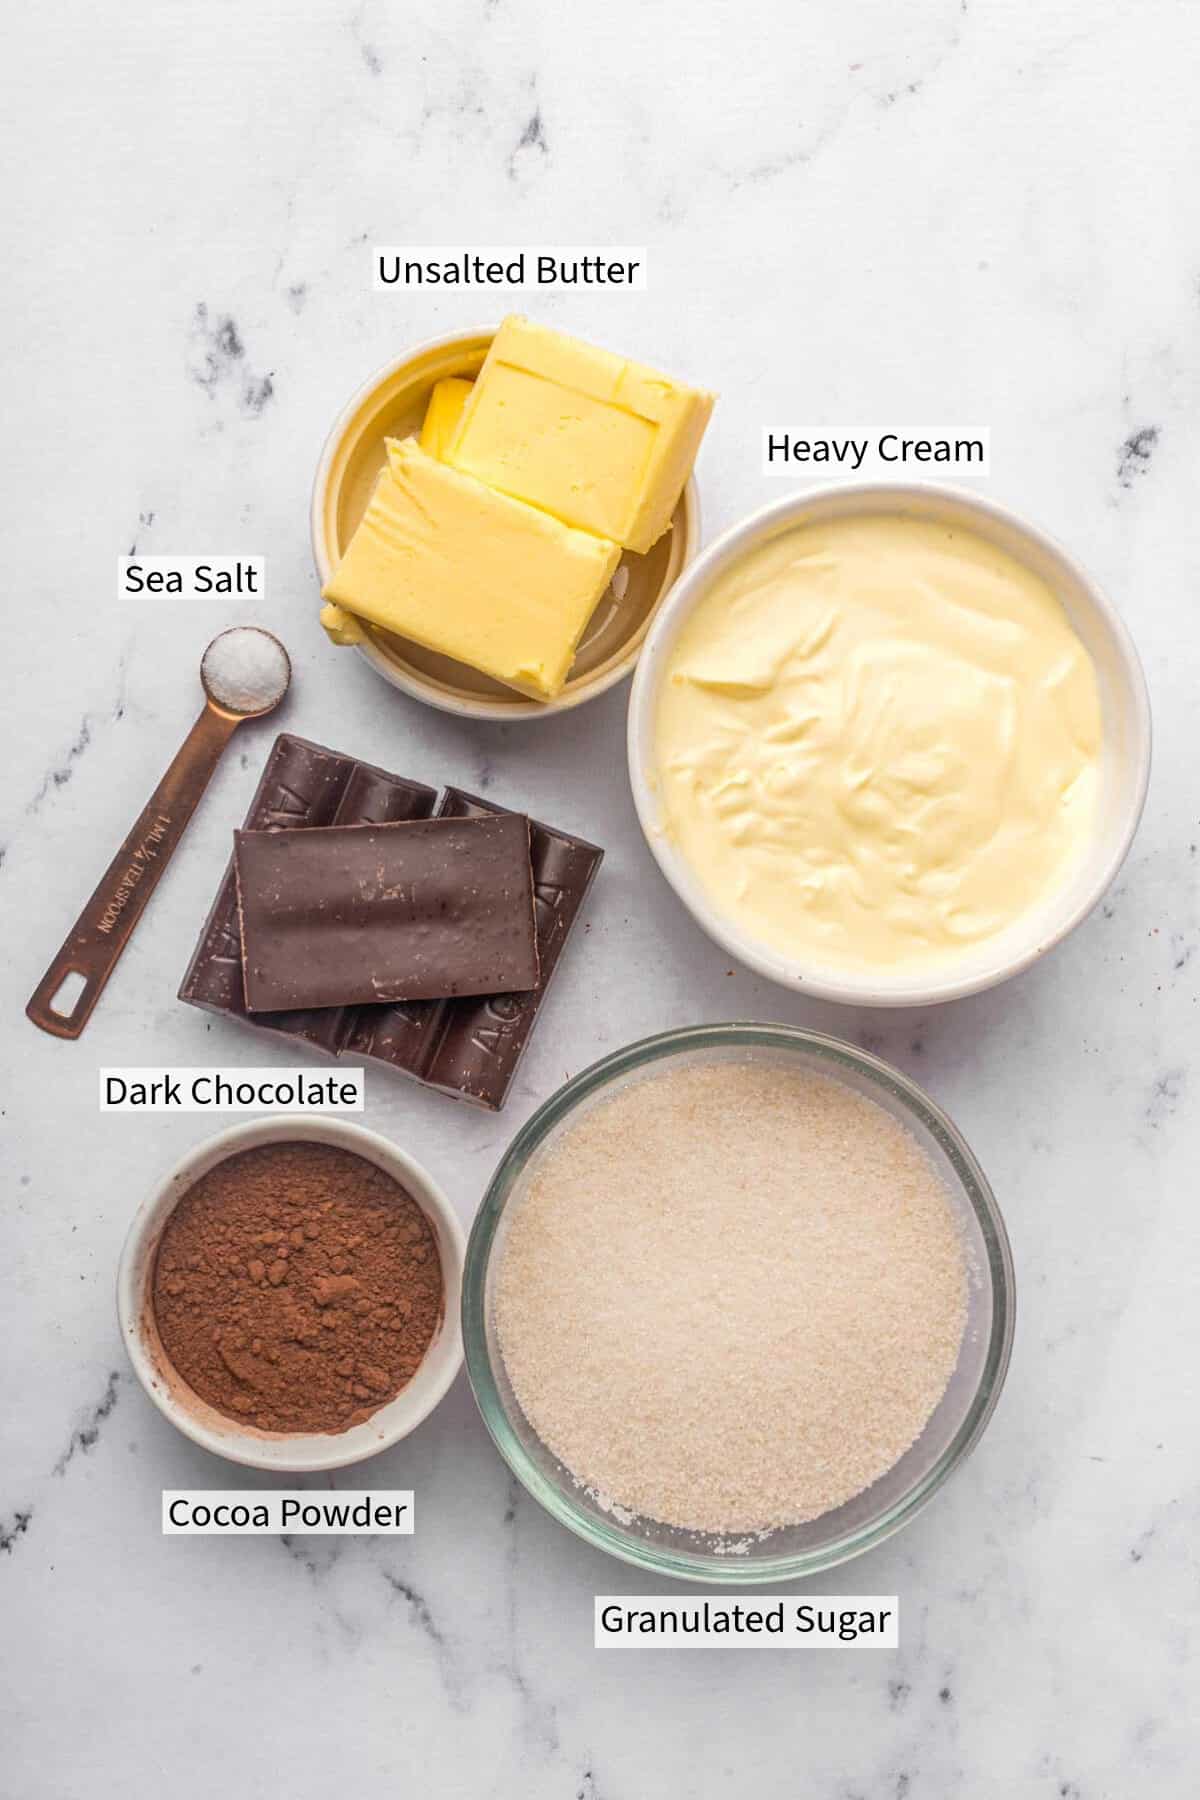
Chocolate Frosting Ingredients
- Baking Soda: The baking soda in this recipe is not just a leavening agent but also crucial for achieving the cake’s deep, rich chocolate color. It enhances the Maillard reaction, giving the chocolate sponges their characteristic dark hue and intensifying the flavor. So, don’t skip the baking soda if you want that signature Matilda cake look and taste.
- Coffee: This recipe calls for half a cup of coffee. This can be espresso, filtered, or instant coffee dissolved in hot water. You can make it the strength you like, although the coffee should only act to enhance the chocolate flavor, not overwhelm it with coffee flavor.
- Dark Chocolate: I prefer semi-sweet Couverture Chocolate, which has extra cocoa butter and gives it a smoother texture and glossy appearance. You can use normal cooking chocolate, but I recommend 60% or higher.
See my recipe card below for a complete list of the ingredients with measurements and notes.
Recipe Variations and Substitutions
Want More Chocolate? For an extra chocolate boost, add a handful of chocolate chips to the batter before dividing it between the pans.
Smaller or Larger Pan Size: If you want thinner or thicker layers, you can use different pan sizes, but you’ll need to adjust the baking time accordingly. Keep an eye on the cakes and use a toothpick to check for doneness.
Step by Step Instructions
Make the Chocolate Cakes
Step 1: Preheat the oven to 340°F
Step 2: Prepare two 8-inch springform pans with parchment paper on the base.
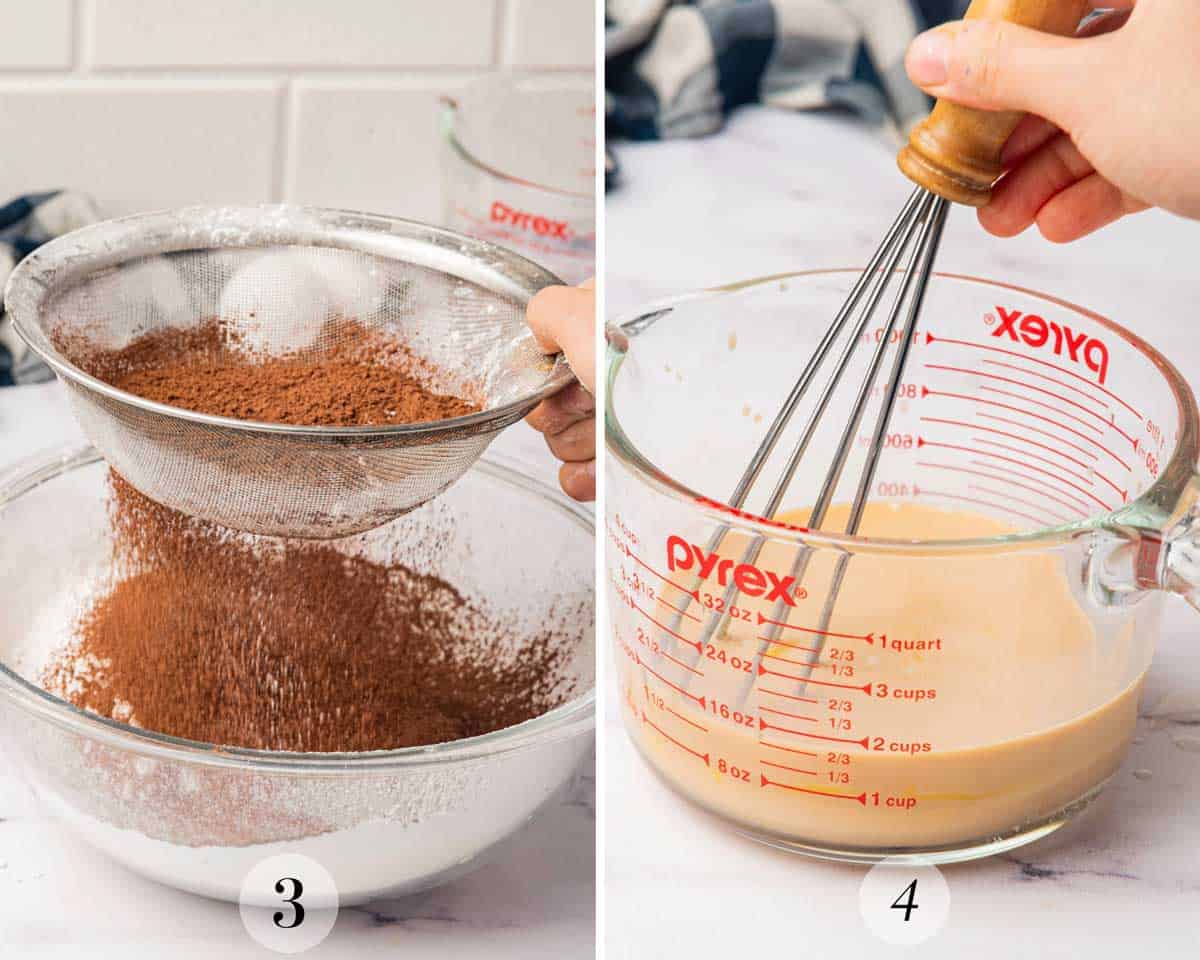
Step 3: Sift the flour, powdered sugar, cocoa powder, baking soda, and salt into a bowl.
Step 4: Combine the brewed coffee, milk, and eggs in another bowl or jug. Whisk together and set aside.
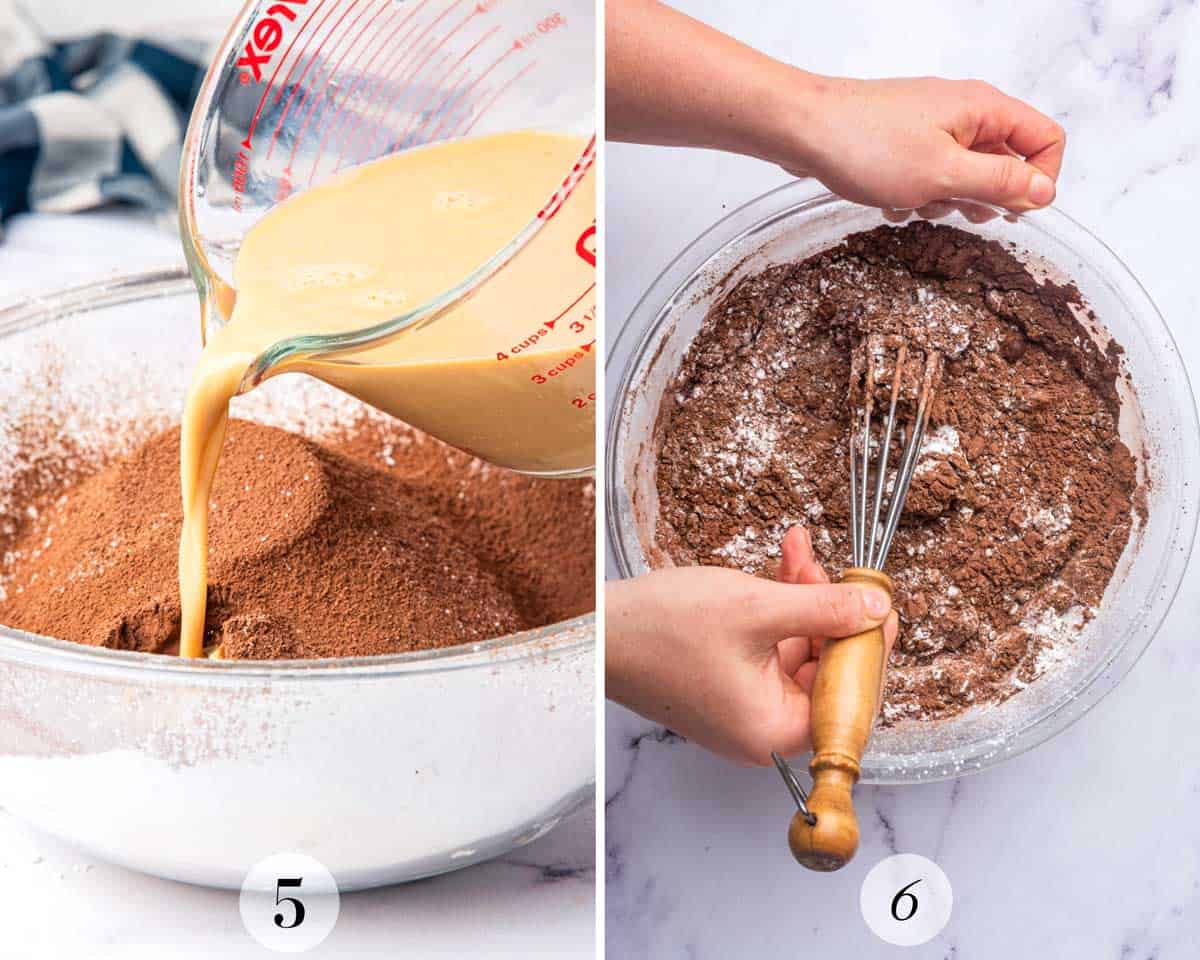
Step 5: Gradually add the liquid mixture to the dry ingredients while mixing.
Step 6: Mix until well combined, ensuring no lumps.
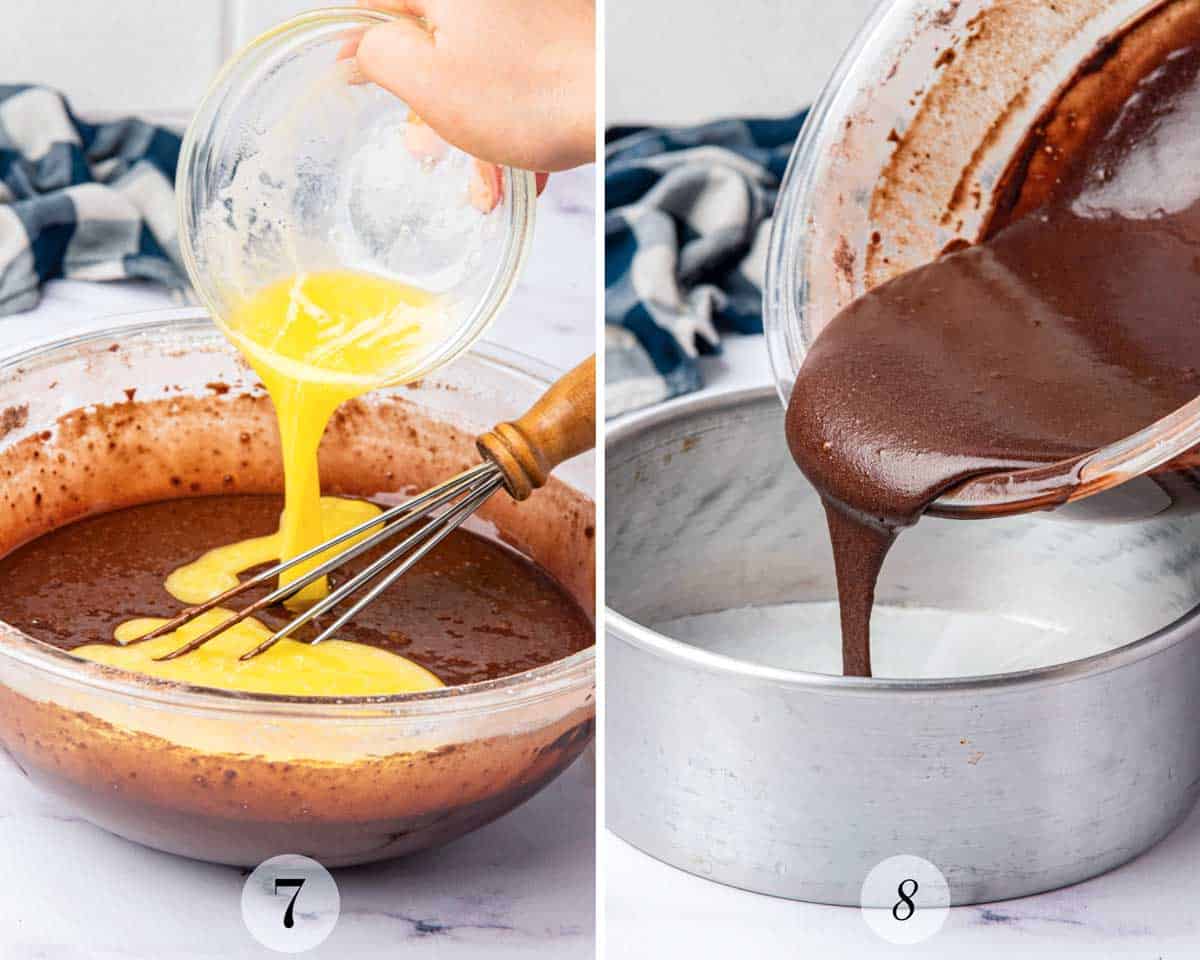
Step 7: Melt the butter, add it to the batter, and mix until combined.
Step 8: Divide the batter evenly among the two prepared pans.
Bake for 25-30 minutes or until a toothpick inserted into the center comes out clean. Let the cakes cool to room temperature, then refrigerate them while making the chocolate fudge frosting.
Make the Chocolate Fudge Frosting
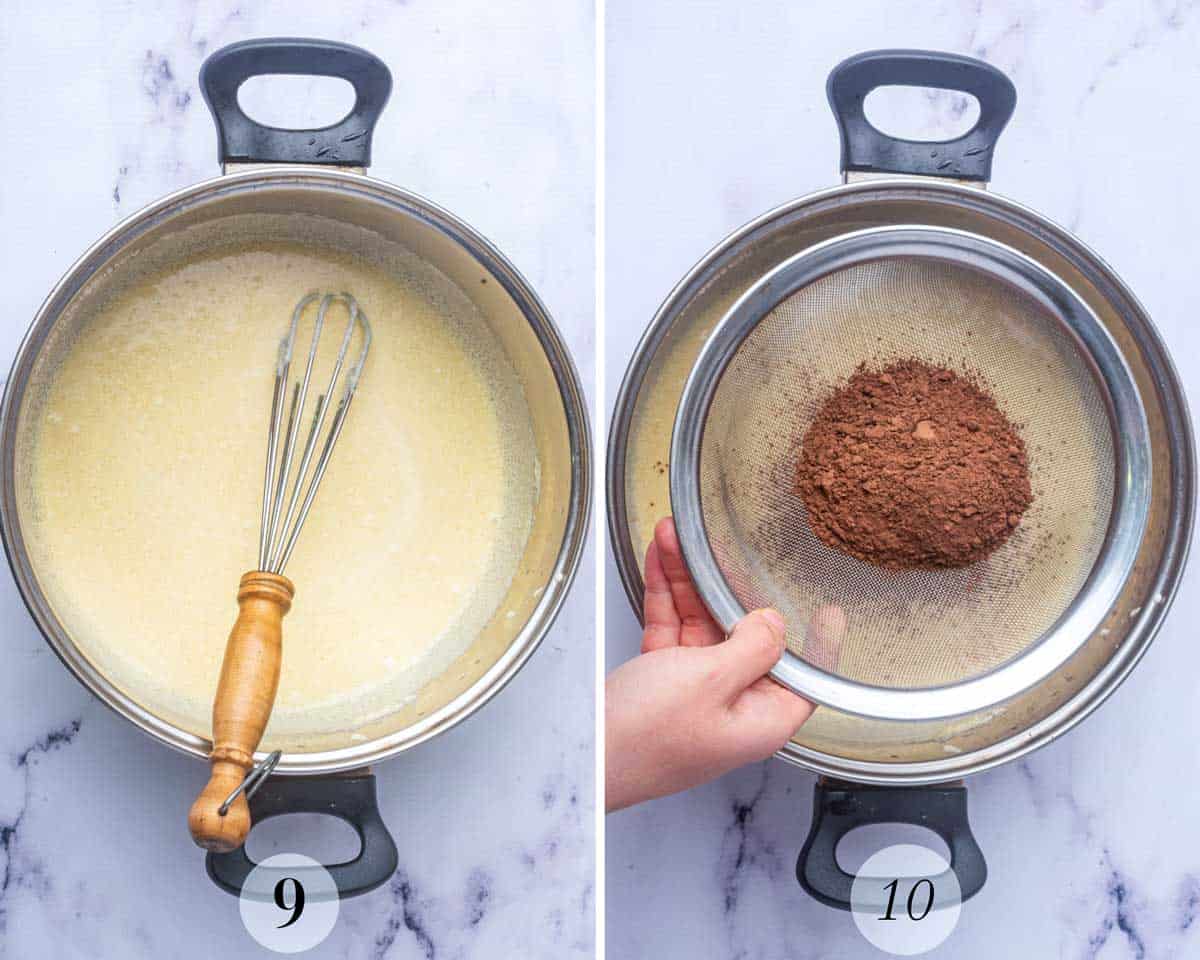
Step 9: In a saucepan, combine the cream and granulated sugar. Mix well.
Heat over low heat until warm.
Step 10: Sift in the unsweetened cocoa powder and mix with a whisk until well combined.
Increase the heat to high and bring the mixture to a low boil, stirring constantly.
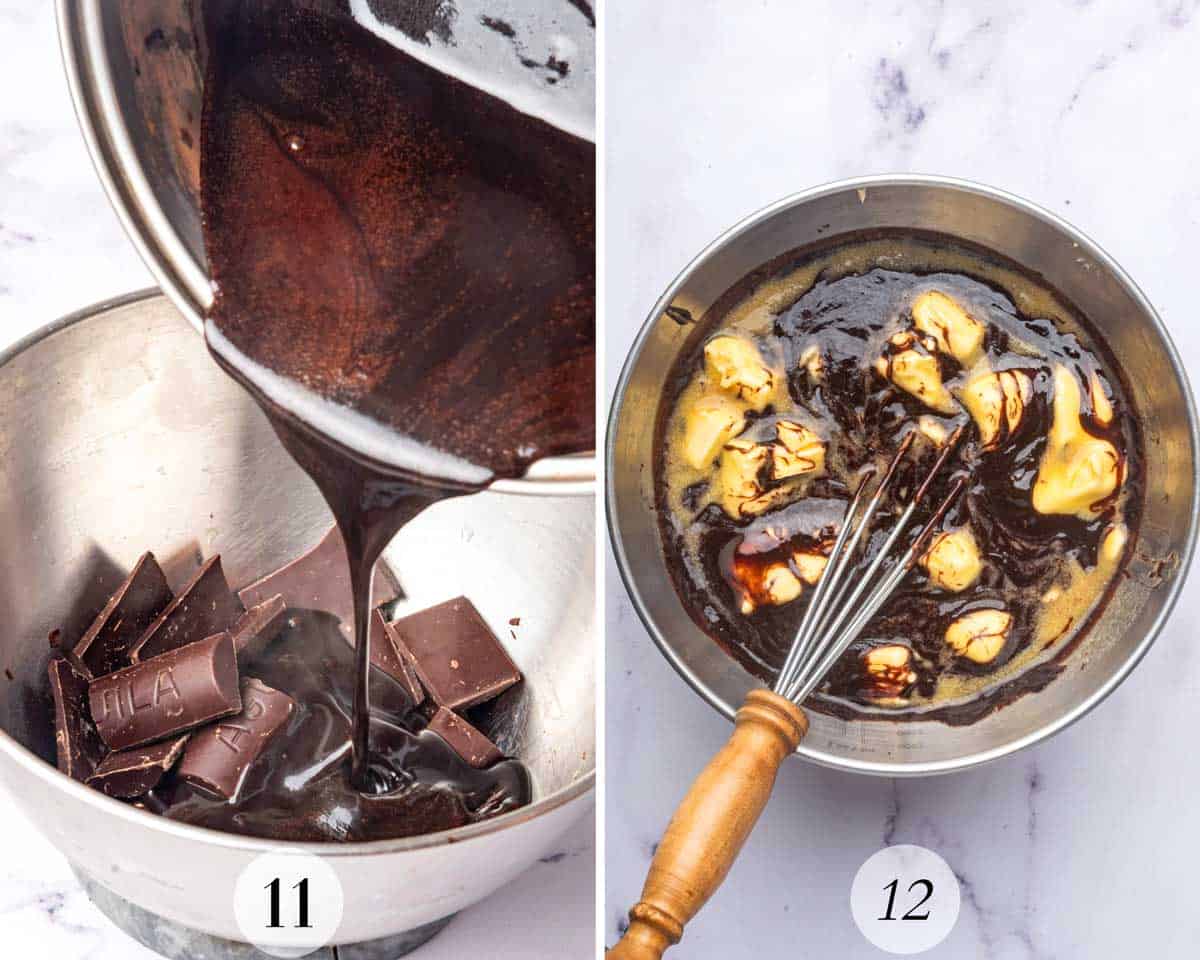
Step 11: Break the dark chocolate into smaller pieces and place in a bowl. Pour the boiling mixture over it, letting the heat melt the chocolate. Whisk the mixture until the chocolate has melted and the mixture is smooth.
Add the salt and mix again.
Step 12: Let the mixture cool slightly, then add the room-temperature butter.
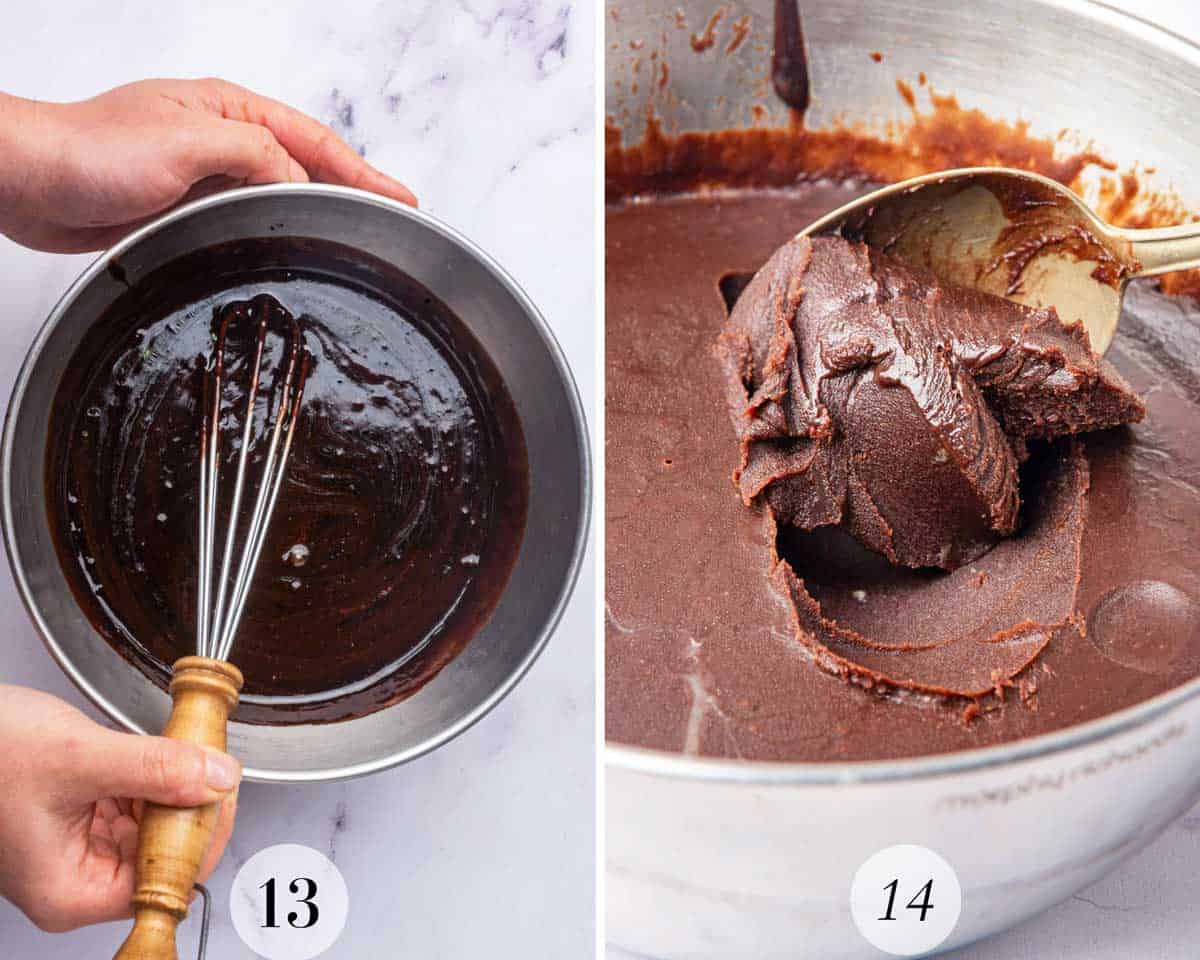
Step 13: Whisk until fully combined. Ensure there are no lumps. For a really smooth frosting, you can pour it through a sieve before the next step.
Step 14: Refrigerate the chocolate frosting mix for a few hours (the longer, the better) so it sets to a thick, paste-like texture. Allow it to come to room temperature before applying it to the cake.
Assemble the Cake
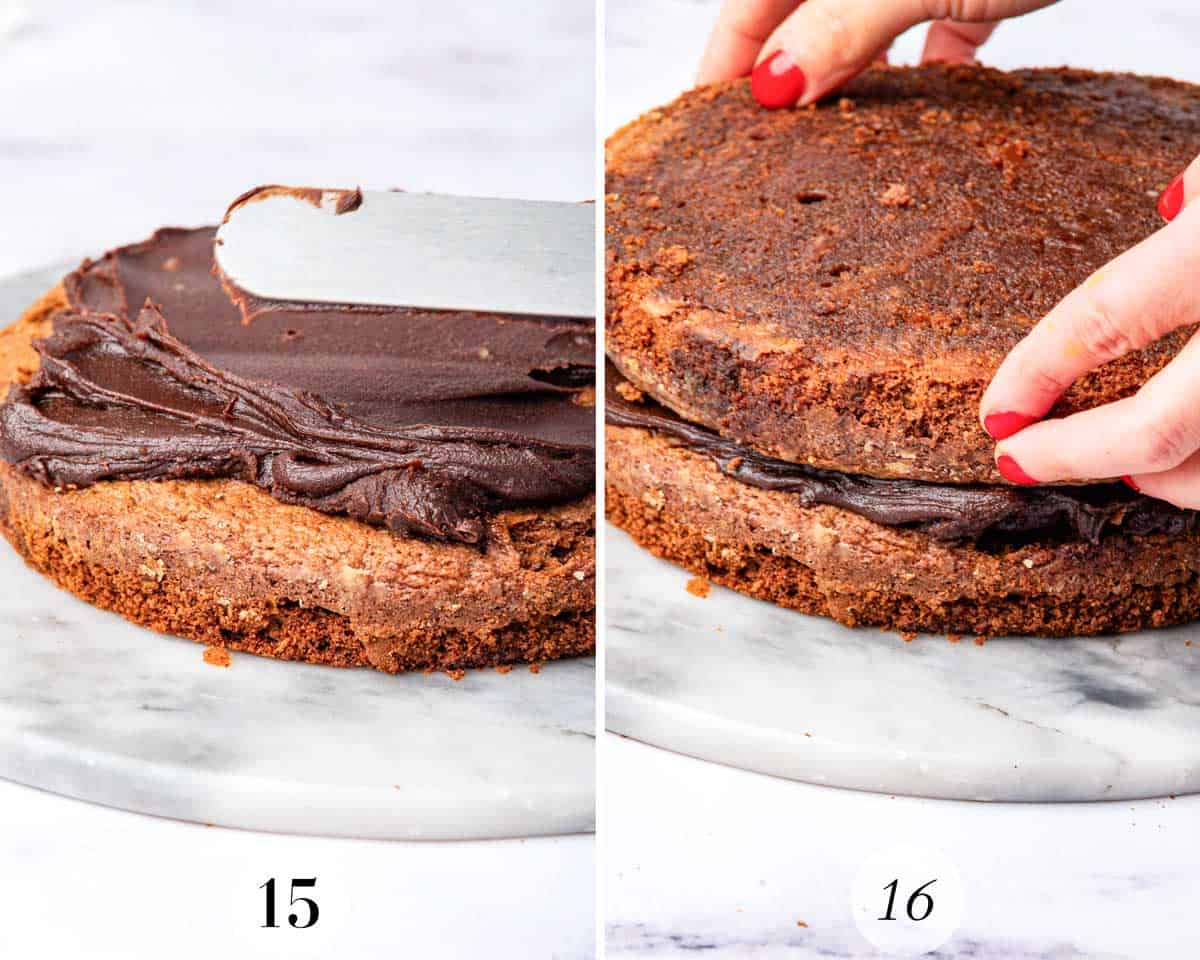
Step 15: Remove the cake layers from their pans. Place the first layer on your serving plate. Spread a thick layer of the chocolate cream over the first cake layer.
Step 16: Add the second cake layer on top. Cover the entire cake with the remaining chocolate cream, smoothing it with a spatula.
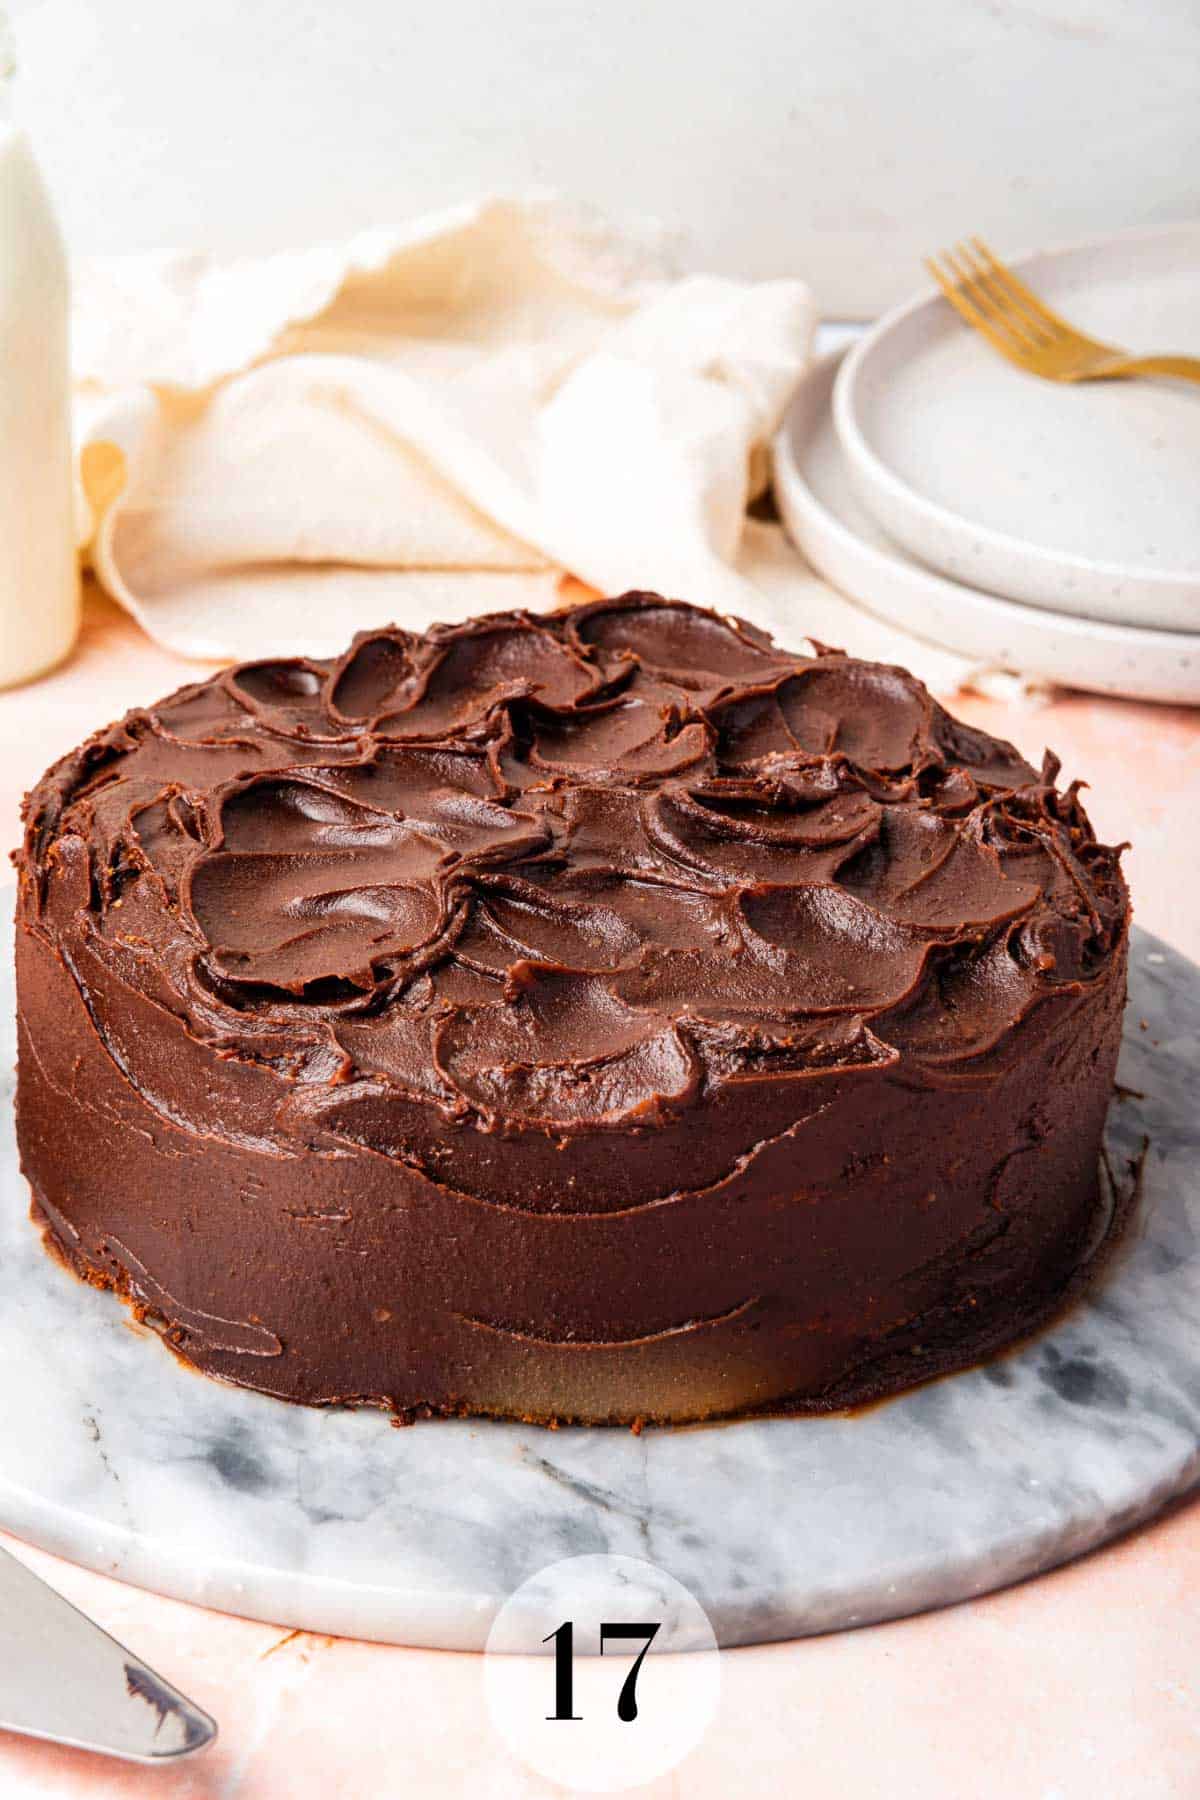
Step 17: Decorate the cake with additional chocolate cream using a spatula to create a peaked or smooth finish.
Expert Tips
Baking Tips
- Room Temperature Ingredients: Ensure that the eggs, coffee, and milk are at room temperature before starting. This helps create a smoother batter and better incorporation of ingredients.
- Even Layers: Use a kitchen scale to evenly distribute the batter between the two pans for uniform layers.
- Don’t Overmix: Mix the batter until just combined to avoid a dense cake. Overmixing can lead to a tough cake texture.
Chocolate Fudge Frosting Tips
- Chocolate Frosting Consistency: If the chocolate cream is too stiff after refrigeration, let it sit at room temperature until it reaches a spreadable consistency. DON’T microwave it, as it will lose its shine and gloss.
- Smooth Finish: For a smooth finish on the cake, dip your spatula in hot water, wipe it dry, and then smooth the chocolate cream. The heat will give the frosting a polished look.
- Layering: Refrigerating the cake layers before assembling will give you a more stable cake to work with. Cold cake will be firmer and easier to handle.
Storage Information
- Room Temperature: The assembled cake can be stored at room temperature for up to 2 days, provided your environment isn’t too warm. Cover it with a cake dome or an inverted bowl to keep it fresh.
- Refrigeration: The cake can be stored in the refrigerator for up to 5 days. To prevent it from drying out, cover it with plastic wrap or store it in an airtight container. Allow the cake to come to room temperature before serving for the best texture and flavor.
- Freezing: To freeze the cake, wrap each layer tightly in plastic wrap and then in foil. Store in the freezer for up to 3 months. Thaw in the refrigerator overnight before assembling and serving.
- Transporting: If you need to transport the cake, refrigerate it first to firm up the chocolate cream. This will help prevent the layers from sliding. Use a cake carrier or a sturdy box to protect it during transit.
Related Recipes
Did you try this Matilda Chocolate Cake?
Please leave me a ⭐ rating below and let me know in the comments how you enjoyed it.
Matilda Chocolate Cake Recipe
Ingredients
Chocolate Sponge Cakes
- 1 ⅔ cups all-purpose flour - the most refined you can find without leavening agents
- 2 ½ cups powdered sugar
- ½ cup unsweetened cocoa powder
- ½ tbsp baking soda
- ½ tsp fine salt
- ½ cup coffee - espresso, filter, or instant dissolved in hot water
- ½ cup milk
- 2 eggs
- ½ cup unsalted butter - melted
Chocolate Fudge Frosting
- 1 ½ cups heavy cream
- 1 ½ cups granulated sugar
- ⅓ cup unsweetened cocoa powder
- 5.6 oz semi-sweet couverture chocolate - chopped
- ½ teaspoon fine salt
- 1 ¼ cups unsalted butter - at room temperature
Instructions
Make the Chocolate Cakes
- Preheat the oven to 340°F
- Prepare two 8-inch springform pans with parchment paper on the base.
- Sift the flour, powdered sugar, cocoa powder, baking soda, and salt into a bowl.
- Combine the brewed coffee, milk, and eggs in another bowl or jug. Whisk together and set aside.
- Gradually add the liquid mixture to the dry ingredients while mixing. Mix until well combined, ensuring no lumps.
- Melt the butter, add it to the batter, and mix until combined.
- Divide the batter evenly among the two prepared pans.
- Bake for 25-30 minutes or until a toothpick inserted into the center comes out clean. Let the cakes cool to room temperature, then refrigerate them while making the chocolate fudge frosting.
Make the Chocolate Fudge Frosting
- In a saucepan, combine the cream and granulated sugar. Mix well. Heat over low heat until warm.
- Sift in the unsweetened cocoa powder and mix with a whisk until well combined.
- Increase the heat to high and bring the mixture to a low boil, stirring constantly.
- Break the dark chocolate into smaller pieces and place them in a bowl. Pour the boiling mixture over it, letting the heat melt the chocolate. Whisk the mixture until the chocolate has melted and is smooth. Add the salt and mix again.
- Let the mixture cool slightly, then add the room-temperature butter. Whisk until fully combined.
- Refrigerate the chocolate frosting mix for a few hours (the longer, the better) so it sets to a thick, paste-like texture. Allow it to come to room temperature before applying it to the cake.
Assemble the Cake
- Remove the cake layers from their pans. Place the first layer on your serving plate. Spread a thick layer of the chocolate cream over the first cake layer.
- Add the second cake layer on top. Cover the entire cake with the remaining chocolate cream, smoothing it with a spatula.
- Decorate the cake with additional chocolate cream using a spatula to create a peaked or smooth finish.
Notes
- Chocolate Frosting Consistency: If the chocolate cream is too stiff after refrigeration, let it sit at room temperature until it reaches a spreadable consistency. DON’T microwave it, as it will lose its shine and gloss.
- Layering: Refrigerating the cake layers before assembling will give you a more stable cake to work with. Cold cake will be firmer and easier to handle.
- Storage: The cake will keep for 2 days, covered at room temperature or 5 days in an airtight container in the fridge.
Leave a Reply