Brighten your picnic with this easy-to-make Orange Upside Down Cake, a simple recipe with stunning results. A moist, airy cake crowned with sweet oranges and a zesty citrus glaze.
With its vibrant flavors and effortless charm, this eye-catching dessert is a seasonal nod to winter’s citrus harvest or a sweet and fresh addition to spring picnics.

Jump to:
What Makes This Recipe Great
- Seasonal Flexibility: Oranges are available year-round, so it’s a perfect cake for any season. However, it shines in late winter to early spring when citrus fruits are at their peak, adding a fresh note to your winter picnic menu.
- Easy to Make: Ready in just over an hour, this cake is so easy to pull together. It’s a fantastic picnic dessert. That’s the beauty of an upside-down cake; they look more elaborate than they are to make. It’s like a sweet cheat.
- No Fridge Required: This is one of those great desserts that don’t require refrigeration, so it is perfect for picnics any time of year.
- Unique Flavor Profile: Like my Gingerbread Cake with Orange Glaze, the cake has a fresh, tangy sweetness thanks to the combination of the caramelized orange and citrus glaze. A nice light and fresh finish to any meal.
Ingredient Notes
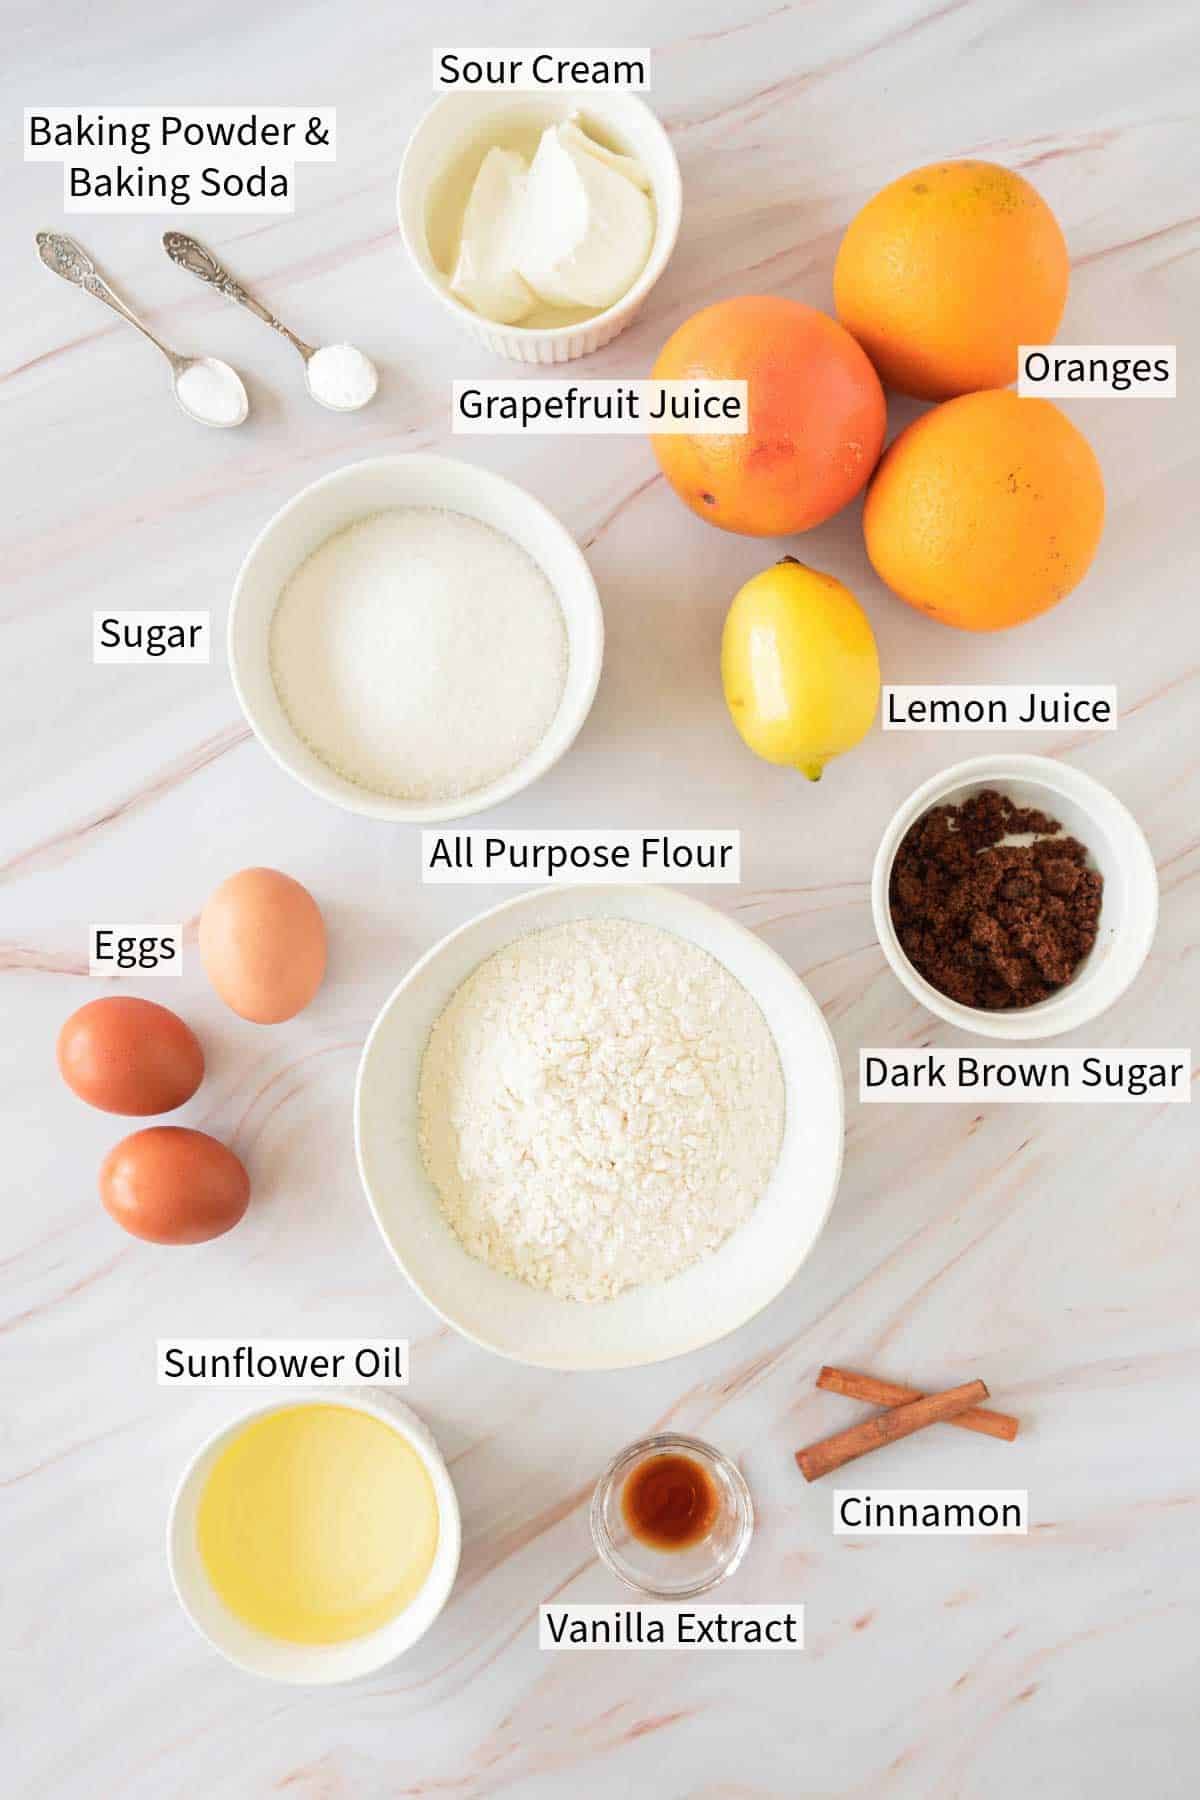
See my recipe card below for a complete list of the ingredients with measurements and notes.
Recipe Variations and Substitutions
The Glaze: I use grapefruit juice for the glaze, but you can use a mix of orange and lemon juice if you don’t have grapefruits.
Citrus Variations: Play with different citrus fruits for the topping and glaze. Blood oranges, tangerines, or Meyer lemons offer beautiful colors and unique flavors. Combine multiple types of citrus in the topping for a multi-citrus upside-down cake. You could go down the pineapple road, but like my Pineapple Hummingbird, that’s a whole other cake.
Toppings: Top with fresh whipped cream or a dollop of Greek yogurt and extra citrus zest before serving for an additional layer of flavor and texture.
A sprinkle of crushed pistachio nuts is also a good combination for this cake, especially with some extra zest and Greek yogurt.
Step by Step Instructions
Step 1: Preheat the oven to 350F. Line the cake pan with baking paper.
Prepare the Orange Topping
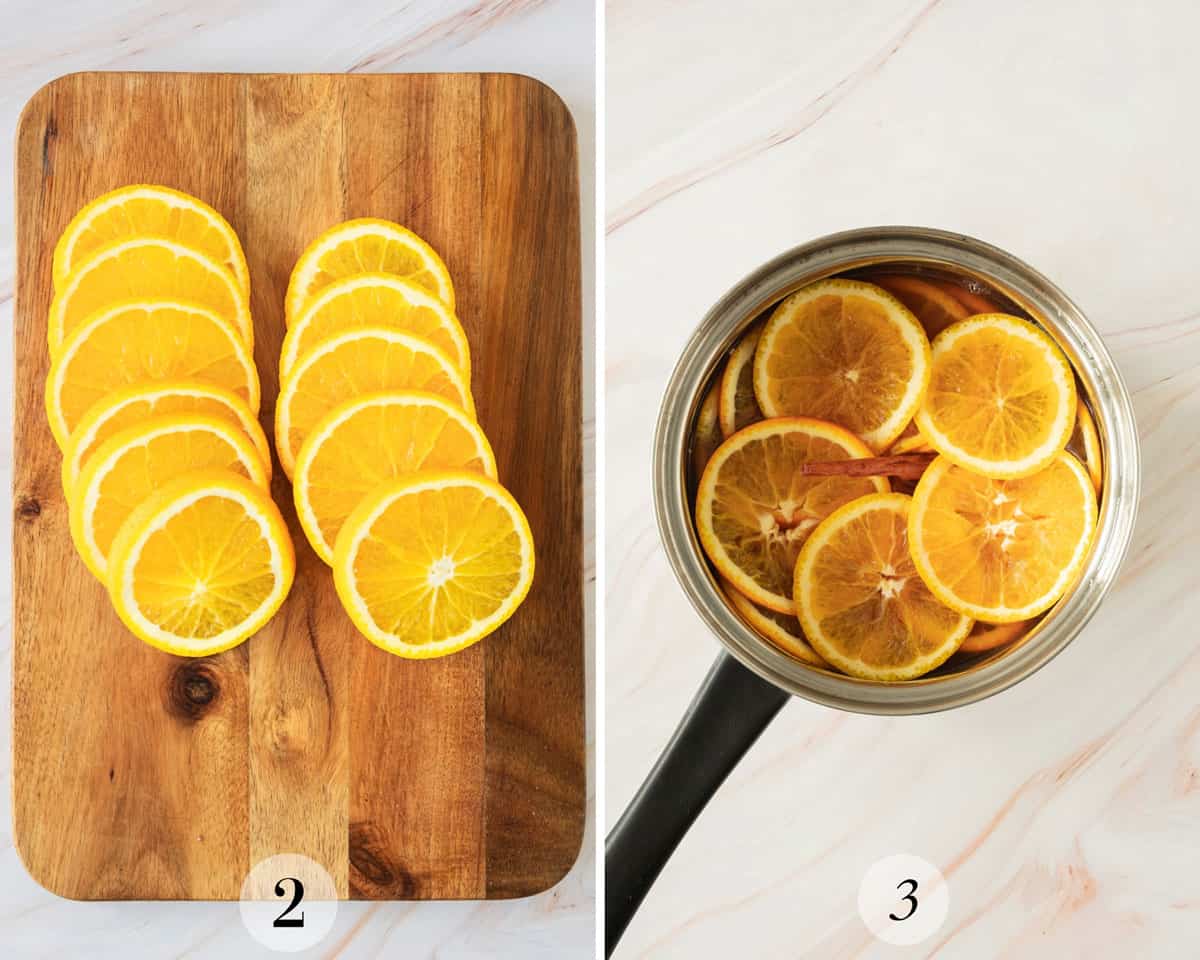
Step 2: Cut the oranges into thin slices (approx. ½ inch). You will need enough to cover the bottom of your cake time with the slices overlapping to cover any gaps.
Step 3: In a bowl, mix the brown sugar, lemon juice, and vanilla. Stir well.
Put the sliced oranges and the cinnamon stick in a small pot. Add the sugar syrup and water. Just enough water to barely cover the oranges.
Place on the stove over high heat. Bring to a boil. After it boils, reduce the heat to the lowest setting and let it simmer for 10 minutes.
Remove from heat and let cool for 10 min.
Prepare the Cake Batter
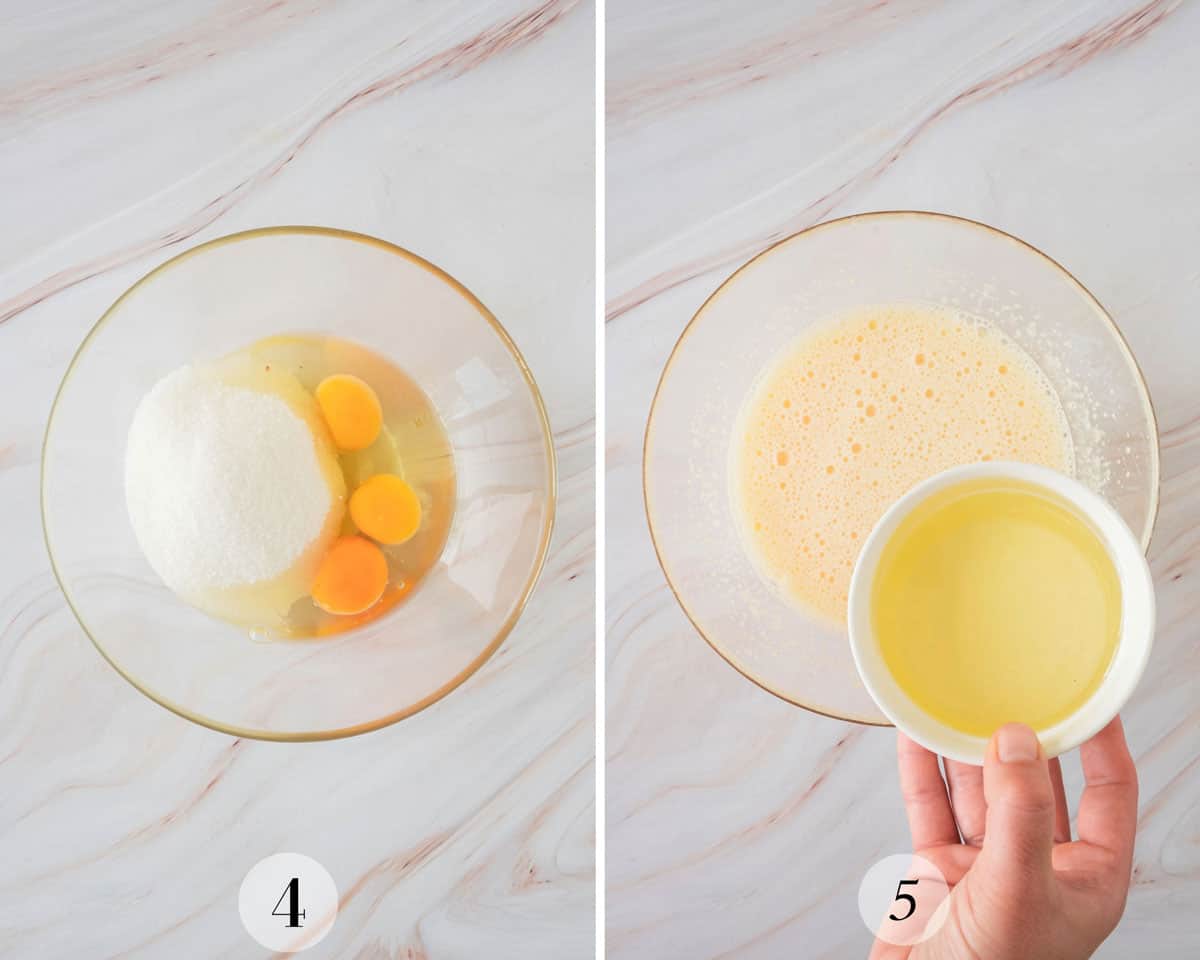
Step 4: In a medium bowl, mix sugar and eggs. Beat the mixture very well for about 2 minutes. A whisk is sufficient for this.
Step 5: Add the oil and beat the texture again for about 1 minute.
Add the sour cream and mix again until combined.
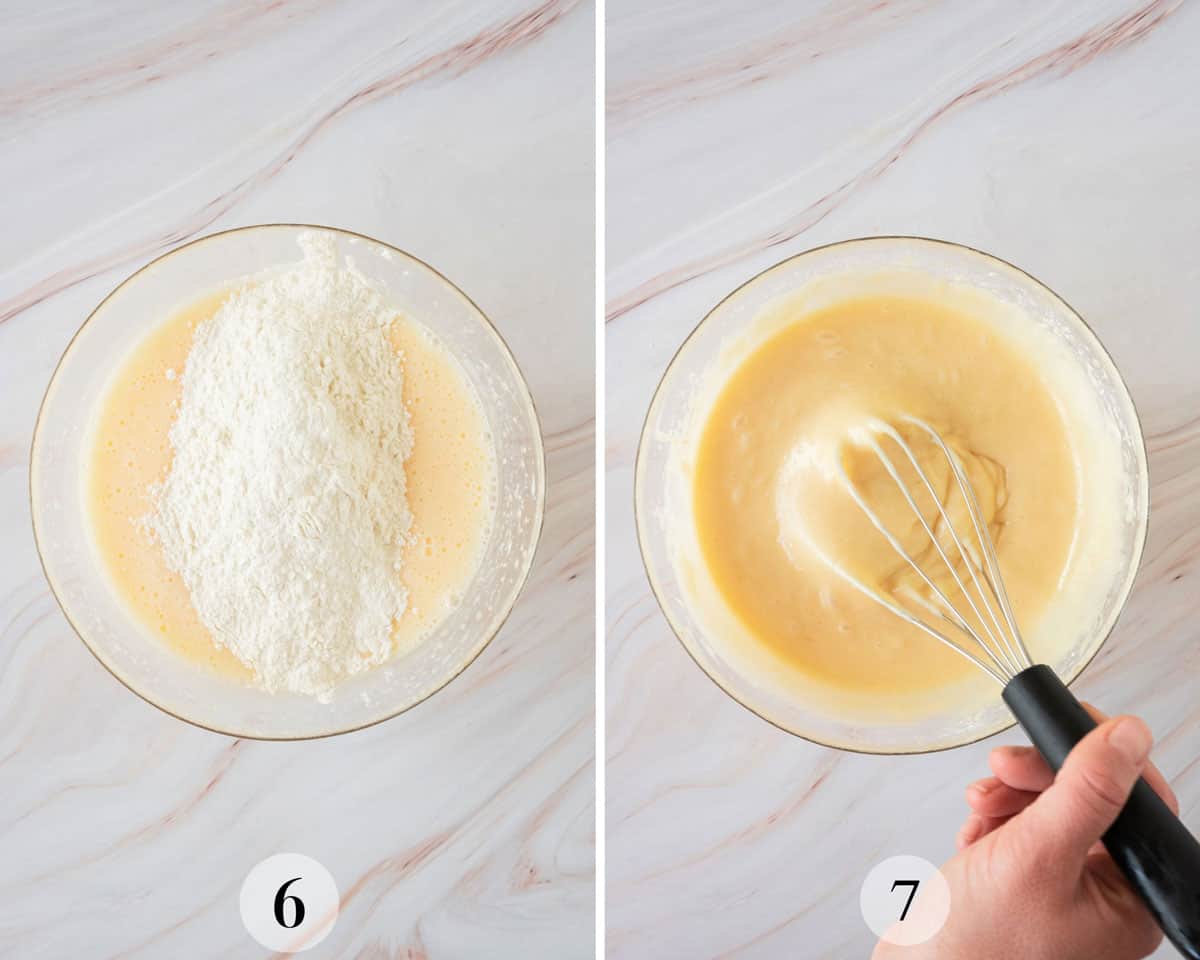
Step 6: Sift the flour, baking powder, and baking soda into a bowl. Add one part of the dry mix to the wet, mixing until combined.
Add the rest of the flour and mix again.
Step 7: Pour the orange juice into the batter and mix until you have a smooth, sticky batter.
Make the Citrus Glaze
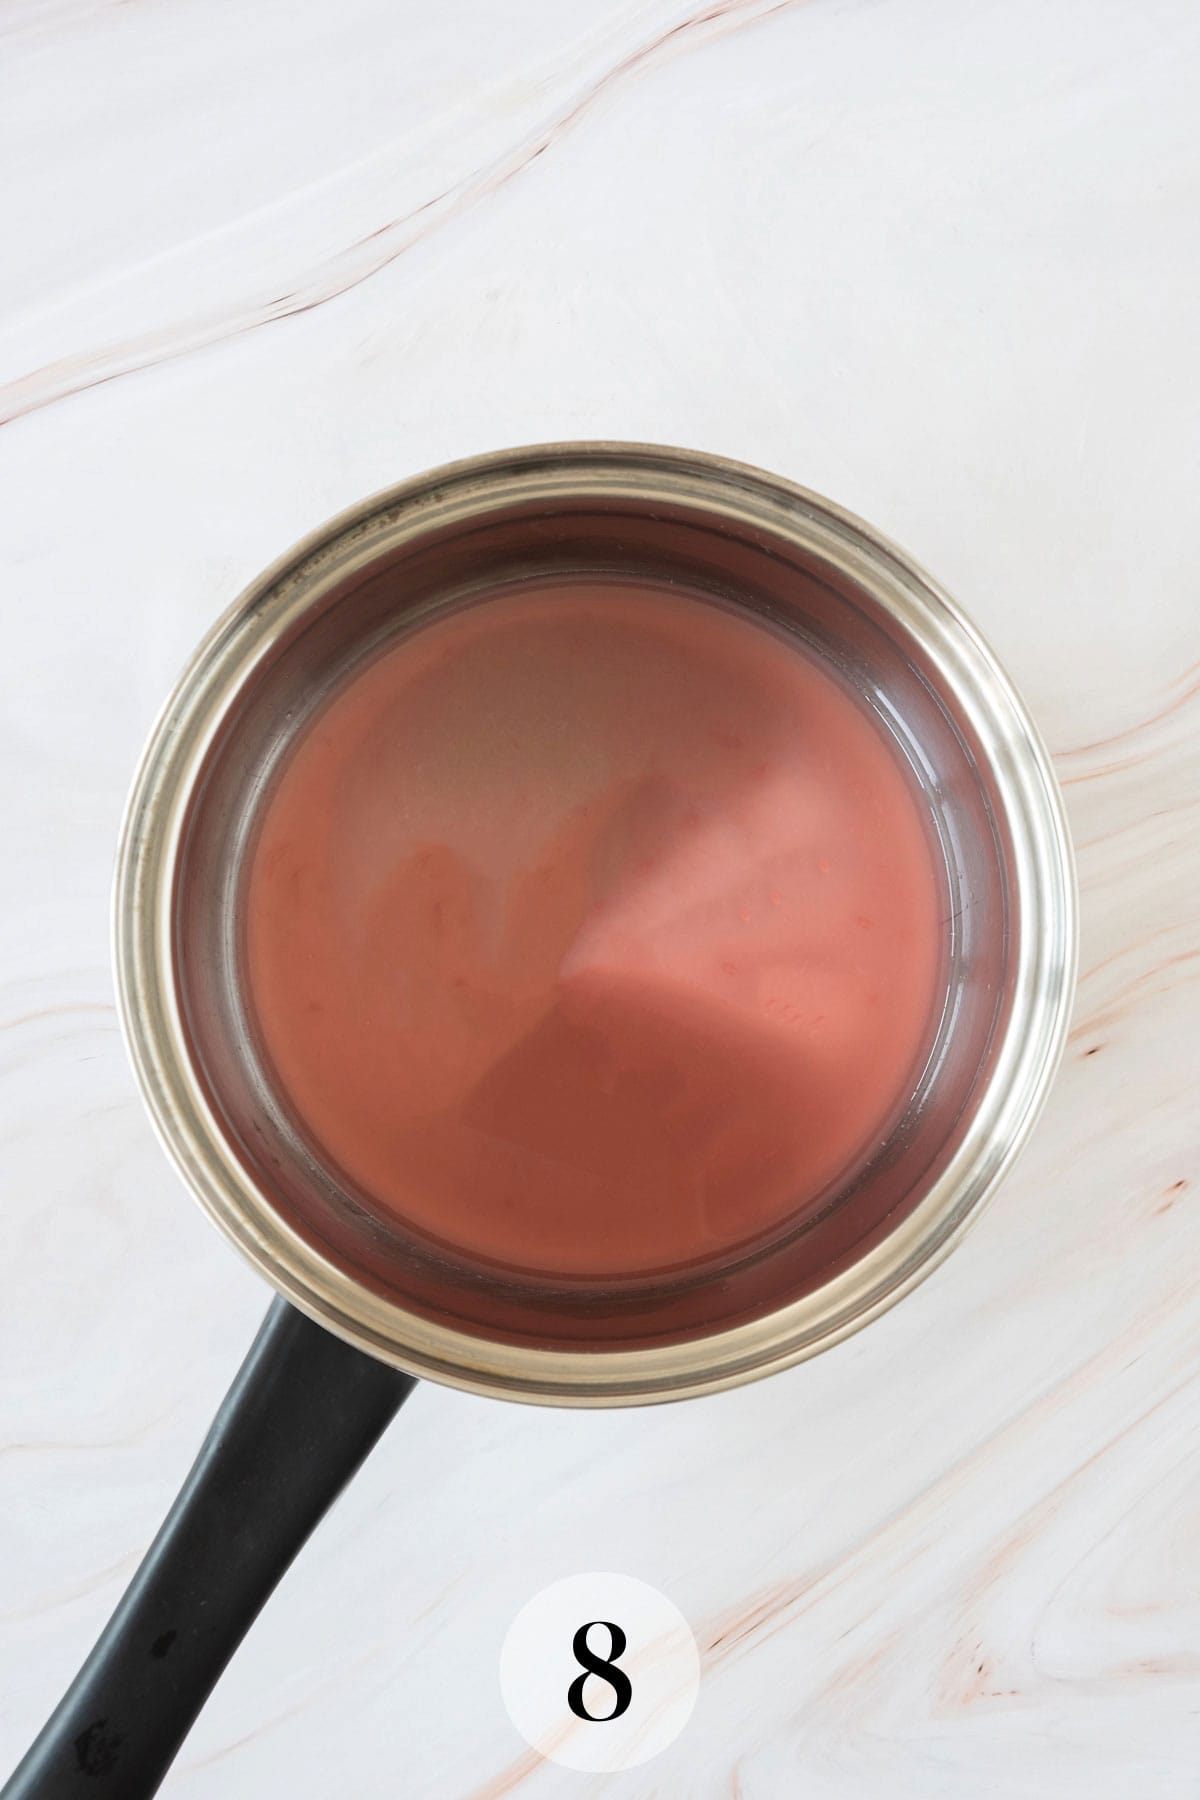
Step 8: Mix the juice of one grapefruit and brown sugar in a small saucepan. Place on a stove over medium heat and stir. Once bubbles appear and the mixture begins to thicken slightly, turn off the heat and allow to cool for 10 minutes.
Note: The mixture will thicken more after you let it cool.
Assemble the Cake
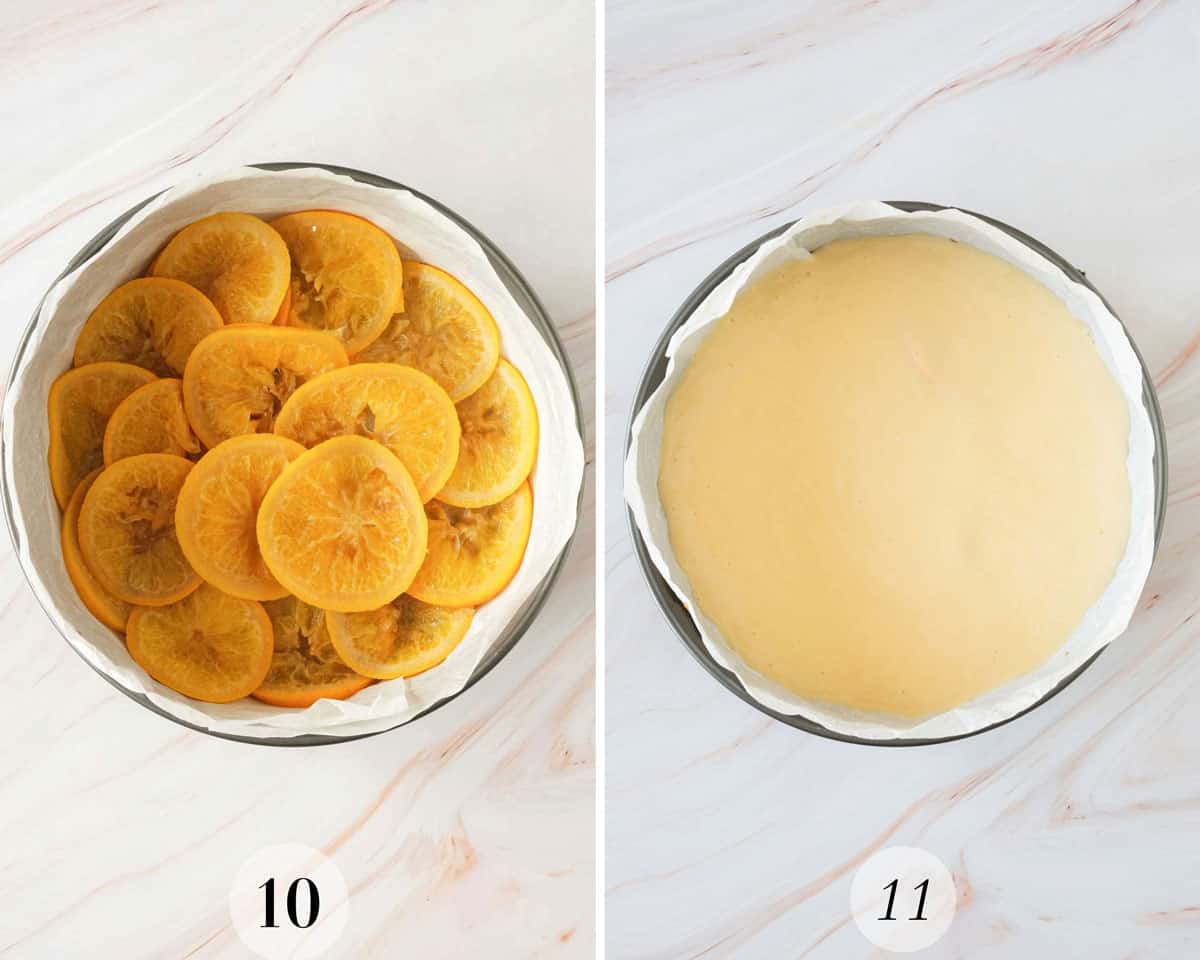
Step 10: Arrange the orange slices close together in the base of the lined cake tin. You can add several orange slices on top of each other. The goal is not to let the batter sink to the bottom of the cake pan.
Step 11: Pour the cake batter over the oranges.
Bake in the oven for 25-30 minutes or until golden brown. Test the cake for doneness with a toothpick.
Remove from the oven and leave in the pan to cool for 15 minutes.

Step 12: Carefully turn the cake onto a wire rack to finish cooling. Once cool, drizzle with the citrus glaze and serve.
Recipe FAQs
Yes, you can use bottled orange juice, but fresh juice is preferred for the best flavor and natural sweetness. You’ll also need fresh oranges for the caramelized orange topping.
Line the bottom of the pan with parchment paper and ensure the orange slices are arranged without gaps. Let the cake cool for about 15 minutes before flipping it onto a plate.
Yes, you can freeze the cake without the citrus glaze. Wrap it well in plastic wrap and freeze for up to 1 month. Thaw at room temperature and add the glaze before serving.
Yes. This cake can be made a day in advance. Store it in an airtight container at room temperature if serving the next day, or refrigerate for up to 3 days. Bring to room temperature before serving.
Expert Tips
Selecting the Right Oranges: Choose oranges that are firm and heavy for their size, indicating juiciness and sweetness. Organic oranges are preferable since you’ll be using the peel. Try to avoid using oranges with really thick peel. Thick peels can give the cake an unpleasant bitterness. If your peels are too thick, although not ideal, you could trim the peels after slicing.
Prepping the Oranges: Thin, even orange slices are crucial for a beautiful presentation. Use a sharp knife to ensure the slices are uniform.
Carefully remove seeds from the orange slices for both presentation and flavor.
Caramelizing the Oranges: Ensure the brown sugar, lemon juice, and vanilla mixture is well combined before adding the oranges.
Simmering the orange slices in the mixture softens them and infuses them with a rich, caramel-like flavor. Don’t rush this step.
Testing for Doneness: Use a toothpick or cake tester inserted into the center of the cake. It should come out clean or with a few moist crumbs attached but no wet batter.
Cooling Before Flipping: Allow the cake to cool in the pan for about 15 minutes before flipping. This helps the cake to set and reduces the chance of breaking.
Flipping the Cake: Place the cooling rack over the cake pan, then quickly and carefully flip it over, holding the rack and pan together. If any orange slices stick to the pan, carefully replace them on the cake.
Serving Suggestions: The cake is best served at room temperature or slightly warmed. The citrus glaze is best drizzled just before serving to maintain its glossy appearance. You can transport this in a sealed container.
Storage: The cake can be kept at room temperature for a day and refrigerated for up to 3 days.
Related Recipes


Have you tried this Orange Upside-Down Cake?
Please leave me a ⭐ rating below and let me know in the comments how you enjoyed it.

Orange Upside Down Cake
Ingredients
Orange Topping
- 2 tablespoon dark brown sugar
- juice of half a lemon
- 1 teaspoon vanilla extract
- 2-3 oranges - depending on the size of the oranges
- 1 stick cinnamon
- water - enough to just cover the oranges in a small pot.
Orange Cake
- 1 cup sugar
- 3 eggs
- ½ cup sunflower oil
- 1¼ cups all-purpose flour
- 1 teaspoon baking powder
- ½ teaspoon baking soda
- ½ cup sour cream
- ¼ cup orange juice
Citrus Glaze
- the juice of one grapefruit
- 2 tablespoon dark brown sugar
Instructions
- Preheat the oven to 350F. Line the cake pan with baking paper.
Prepare the Orange Topping
- Cut the oranges into thin slices (approx. ½ inch). You will need enough to cover the bottom of your cake time with the slices overlapping to cover any gaps.
- In a bowl, mix the brown sugar, lemon juice, and vanilla. Stir well.
- Put the sliced oranges and the cinnamon stick in a small pot. Add the sugar syrup and water. Just enough water to barely cover the oranges.
- Place on the stove over high heat. Bring to a boil. After it boils, reduce the heat to the lowest setting and let it simmer for 10 minutes. Remove from heat and let cool for 10 min.
Prepare the Cake Batter
- In a medium bowl, mix sugar and eggs. Beat the mixture very well for about 2 minutes. A whisk is sufficient for this.
- Add the oil and beat the texture again for about 1 minute. Add the sour cream and mix again until combined.
- Sift the flour, baking powder, and baking soda into a bowl.
- Add one part of the dry mix to the wet, mixing until combined. Add the rest of the flour and mix again.
Make the Citrus Glaze
- Mix the juice of one grapefruit and brown sugar in a small saucepan. Place on a stove over medium heat and stir. Once bubbles appear and the mixture begins to thicken slightly, turn off the heat and allow to cool for 10 minutes.
- Note: The mixture will thicken more after you let it cool.
Assemble the Cake
- Arrange the orange slices close together in the base of the lined cake tin. You can add several orange slices on top of each other. The goal is not to let the batter sink to the bottom of the cake pan.
- Pour the cake batter over the oranges.
- Bake in the oven for 25-30 minutes or until golden brown. Test the cake for doneness with a toothpick.
- Remove from the oven and leave in the pan to cool for 15 minutes.
- Carefully turn the cake onto a wire rack to finish cooling. Once cool, drizzle with the citrus glaze and serve.
Notes
- The Glaze: I use grapefruit juice for the glaze, but you can mix orange and lemon juice if you don’t have grapefruits.
- Citrus Variations: Play with different citrus fruits for the topping and glaze. Blood oranges, tangerines, or Meyer lemons offer beautiful colors and unique flavors.
- Select the Right Oranges: Choose oranges that are firm and heavy for their size, indicating juiciness and sweetness. Organic oranges are preferable since you’ll be using the peel. Try to avoid using oranges with really thick peel. Thick peels can give the cake an unpleasant bitterness. Thin, even slices are important for presentation and flavor.
- Cooling Before Flipping: Allow the cake to cool in the pan for 15 minutes before flipping. This helps the cake to set and reduces the chance of breaking.
- Flipping the Cake: Place the cooling rack over the cake pan, then quickly and carefully flip it over, holding the rack and pan together. If any orange slices stick to the pan, carefully press them back onto the cake.


Leave a Reply